


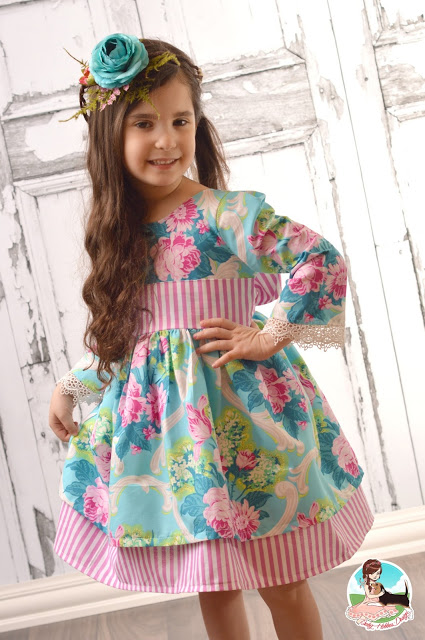
Merav of Baby Hobbes Design is back with Part II of her take on the new Sally dress, this time with long sleeves. Sally is the perfect year round dress and super simple for the beginner sewist. We hope you give her a try and don’t forgot to share your creations with us on Facebook and Instagram!
Sally Part II, Long Sleeves for the Win
I am so happy to be back with part II of the Sally Dress tour, and this time I am here to share with you an easy trick for a year-round dress. I am always in the market for new and easy beginner patterns-and, as we discussed in last week’s post, Sally is just that! But how about Sally with sleeves?
I adore the tank style, pull-over Sally dress! Here in the Windy City, we are still in LONG sleeves for a few more months. And a versatile pattern means ‘A Win’ for me-to sew year round.
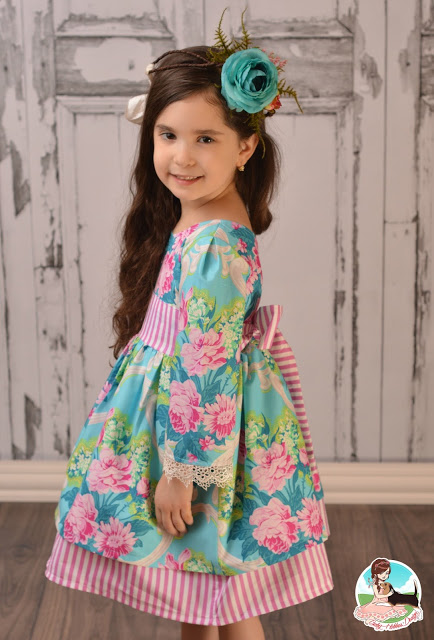
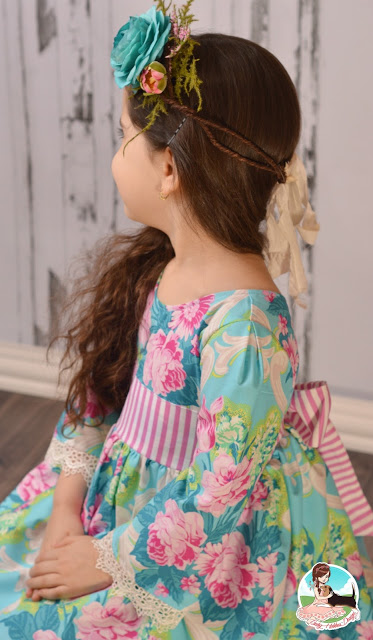
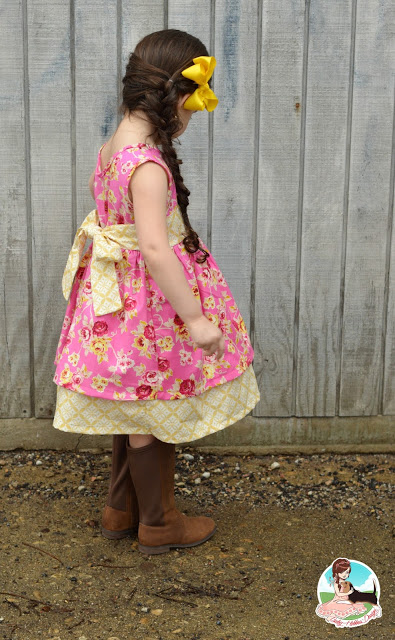
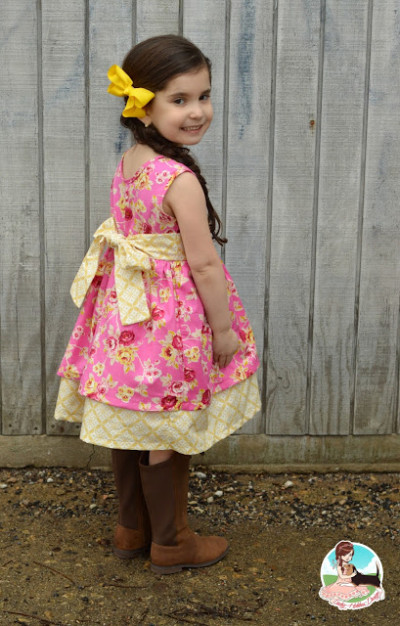
This week I let Hobbes play around with my beautiful Sis Boom fabric collection, and I was in heaven when she pulled out Caravelle Arcade’s Jessica in Blue and Beauty Queen’s Katie stripe in Pink. My head (and heart) went straight into Valentines mode, and we decided this will be her dress for our big Valentines fundraiser next month.
You are going to love how easy it is to take Sally and change her up to meet the demand of the weather. To achieve this look, you will need the Gabriella Fae pattern for its bodice and sleeves. Also, if you are a sucker for lace like me, check out my November Blog here for adding these pretty darling details.
Once you have both the Sally and Gabriella Fae bodice pieces cut out to size, go ahead and follow the steps here in order to change the arm cycle of Sally to adjust for the sleeves.
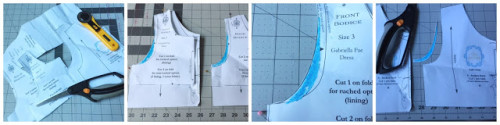
Looking at the pictures above, from left to right. First, cut your pattern size in both dress bodice to size. Next, lay the Gabriella Fae front bodice on top of the Sally front bodice. Match the shoulders at the arm cycle edge. For this quick transformation, I am not changing anything else in the pattern–just the curve of the arm. As you can see, I shaded/colored in the difference in arm curve directly on the Sally for easy cutting. Once you have your markings on the front (repeat with the back bodice), go ahead and cut off the markings so your Sally can accept Gabriella Fae sleeves.
***Please note that you can do this trick with most of your patterns. Always remember to change the arm-cycles and note the difference in the shoulder alignment.
Next, sew your sleeves. You may choose to follow the Gabriella Fae directions to add your sleeves. Because I have experience sewing that pattern, I decided to change it up a bit and add a pleat at the top shoulder instead of a gathered puff. I’ll be honest, it was an experiment, but I had nothing to lose–it’s all in the pinning.
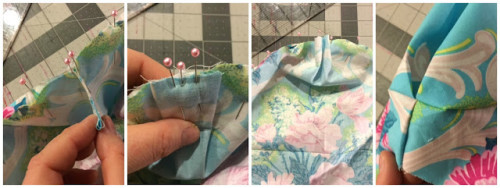
It’s so easy to add this small detail. First, fold your sleeve in half and stick a pin in the top middle. Then, starting from the edge, pin your sleeve to the bodice until you are at the halfway point/reached your shoulder seam on the bodice. Then move to the other side of the sleeve, starting from that end, pinning till you reach the middle of the bodice.
Looking at the pictures above, from left to right: grab your excess sleeve material in the center (bout 3-3,5 inches) and make sure that the sleeve is pinned perfectly up to the shoulder seams. Next, you will want to flatten the access sleeve and perfectly align it with the center seam on the shoulder. Pin in down and check it on both sides to make sure the pleat center is aligned with shoulder seam. Once you are happy, sew it up to the bodice.
Once you have added on your sleeve, continue with the Sally directions. Just remember when you are sewing your front and back bodice closed, you are starting at the sleeves and sewing down.
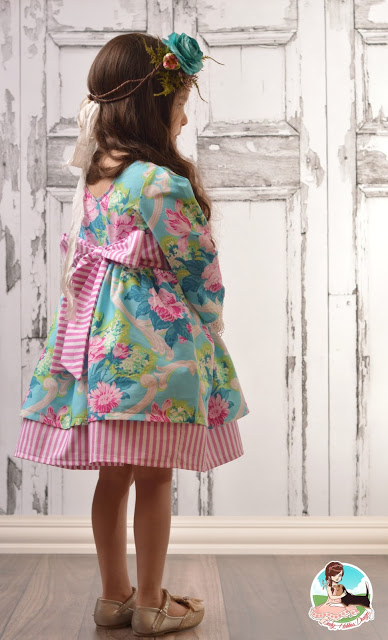
And that’s how I got Hobbes this new Sally. It’s an easy beginner, pullover darling dress pattern.Now show me how you transform your Sally dress. Get your copy of Sally and Gabriella Fae here.
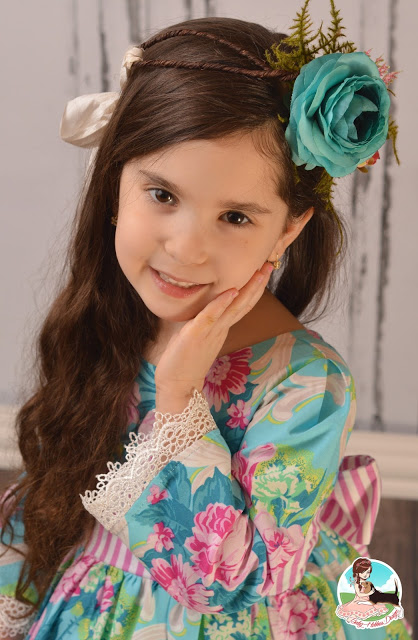
Special thanks to my talented friend Julie over at the Little Sparrow Bows for her perfectly made to match hair halo.
Like my backdrop? Temperatures have been in the teens here and I just didn’t have the heart to ask Hobbes to pose outside. Loving my new Big Time Prints (formally Bubblegum Backdrops) for a quick and warm photo-shoot.
Till next time, happy sewing!
~Merav @ Baby Hobbes Design
It finally feels like winter here in the US – brrrr. If you’re on the East Coast, a big storm is probably headed your way. Hope you have a fun project to keep you busy while you are snowed in. As always, share with us on Facebook or Instagram. We love to see what you are up too!
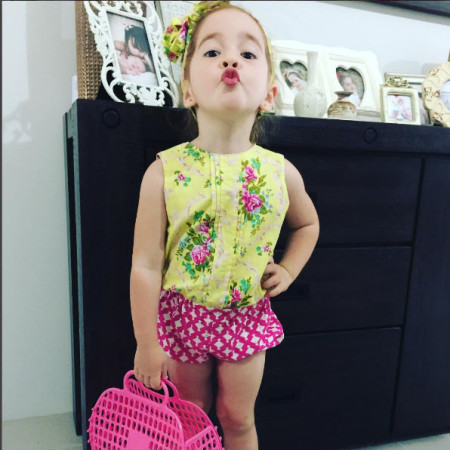
summer.lillies – this cutie is rocking a sweet pleated top in Melody and shorts in Phyllis from the Good Company line.
whatbellawears: darling bloomers and head wrap in Vickie from the Good Company line.
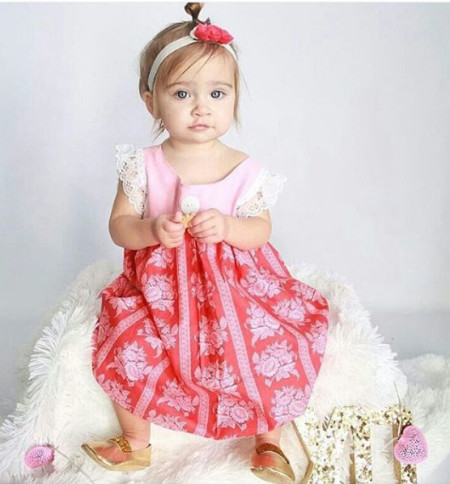
thebabybirdboutique: this cutie is sitting pretty in a dress made of fabric from the Jenny Eliza line for JoAnn Fabrics.
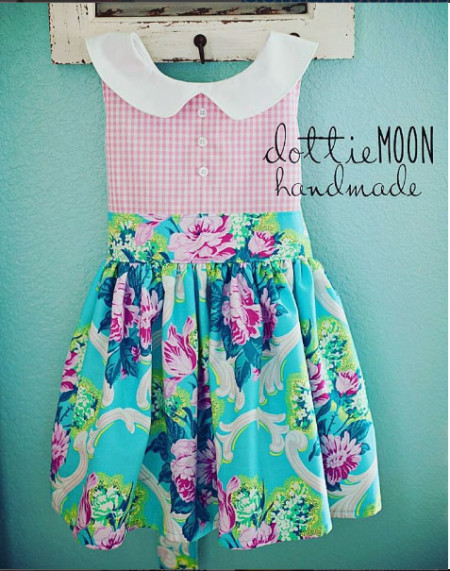
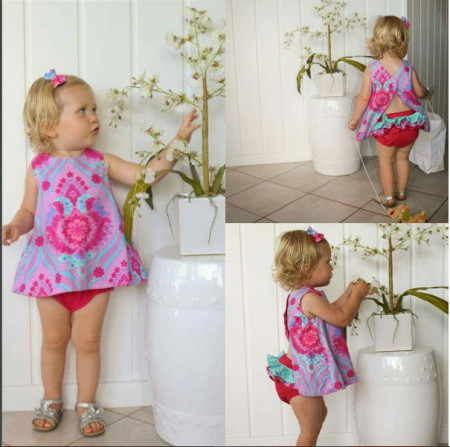
dottiemoonhandmade: we are smitten with this dress in pink gingham and Jessica from Caravelle Arcade.
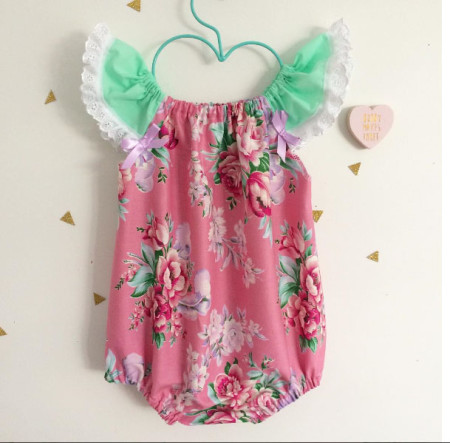
bubbymakesthree: darling romper in Taylor from the Circa fabric line.
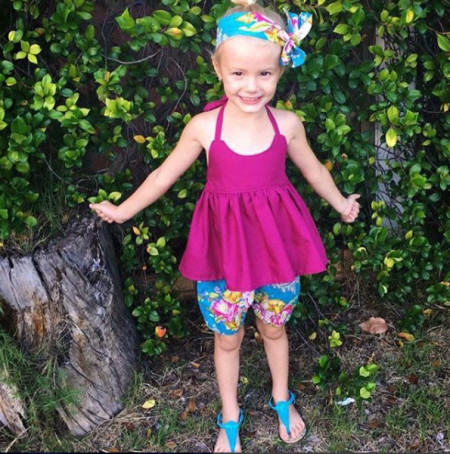
lilpeaak: does this come in my size? Loving this outfit with cute ruffled bloomers in Priscilla from the Crazy Love line.
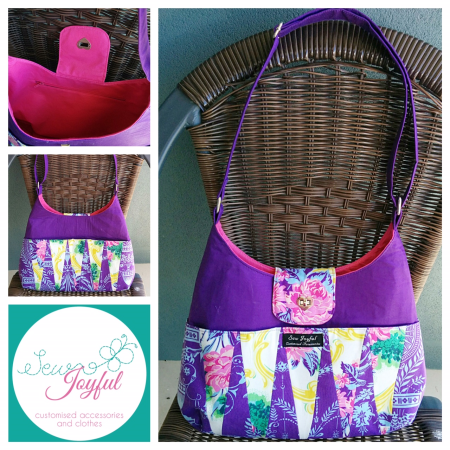
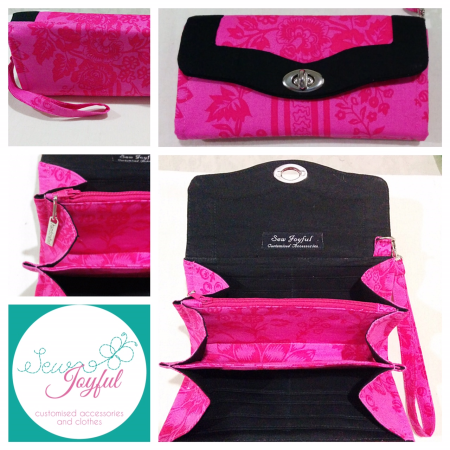
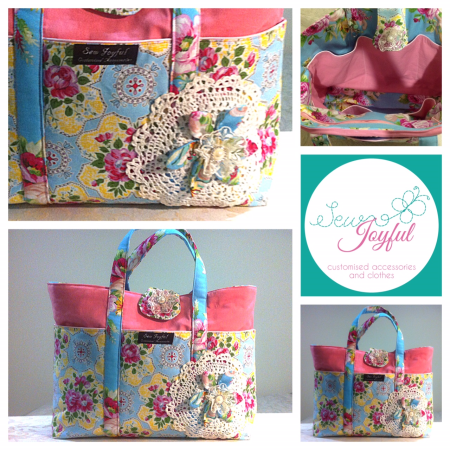
Joy Morgan out of Townsville in Queensland, Australia runs the Sew Joyful company making lovely bags and wallets. Thanks for sharing your creations with us, Joy. As always give us a shout on Instagram or Facebook and let us know what you are making with your favorite Sis Boom fabric.
Joy made the Backgammon bag designed by Betz White using fabric from the Caravelle Arcade line.
A lovely bag called the Epiphany bag designed by ChrisW Designs and sewn by Joy also in Caravelle Arcade.
Emmaline clutch pattern in Candice from Happy Land.
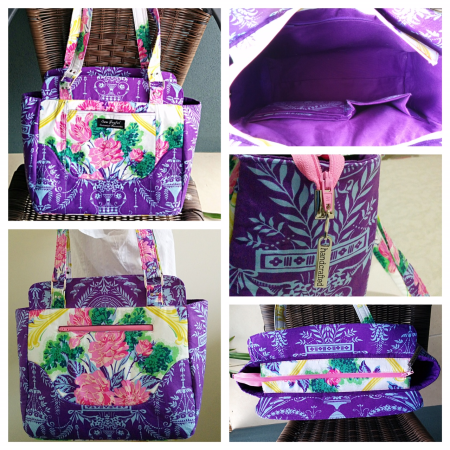
Nappy bag with lots of pickets inside and out made in Austin from the Circa line.
Merav and her lovely daughter Hobbes from Baby Hobbes Design are back and they are reviewing our newest Sis Boom dress, the Sally. Sally is available for the special introductory price of $7.50 till Sunday, 1/17/16 at midnight EST.
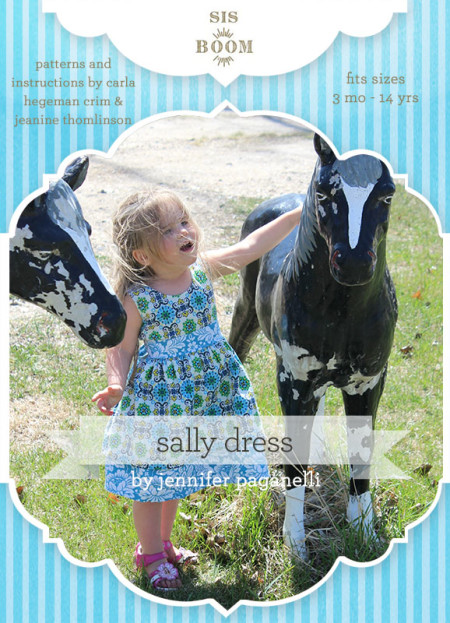
Make room for the SisBoom Sally…a beginner venture to creating a beautiful dress.
I must say that as much as I like challenging myself with new sewing complexity; I am always in the market for an easy beginner sewing pattern without buttons or zippers to whip up with a moment’s notice. Like when Hobbes comes home from school and tells me “Mom, my friend Olivia asked for a My Little Pony dress, can that be her birthday present?…and the party is tomorrow!!!!” Or when I have a new sewing student who is eager to sew her first dress–but is uncomfortable with embellishments like buttons and zippers. The Sally is going to be my new go-to pattern; and I can’t wait to introduce her to you!

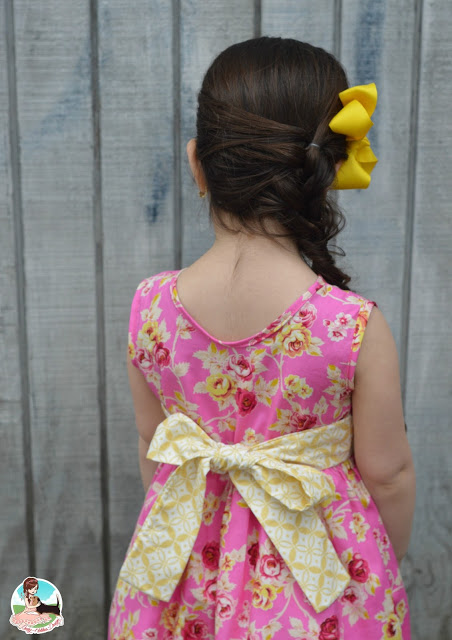
The Sis Boom Sally sports a simple, yet modest tank bodice with two neck option that your child can pull on and off herself without any closures. The bodice is relaxed and the (optional) side sash and elastic sewn directly to the seams (no casing) can assist for a more fitted look. You can create two skirt looks. I chose to create the dress with a top skirt, but you can keep it simple and conserve fabric by sewing the bottom skirt only.
In true Sis Boom style, you’ll learn sewing techniques – Sis Boom Sally focuses on bias tape placement for an unlined bodice (woohoo, less fabric) and you can get creative making your own bias to match. Store-bought bias is welcomed too–and you can place the bias flushed over the head and arm opening or use it to line the inside edges only.
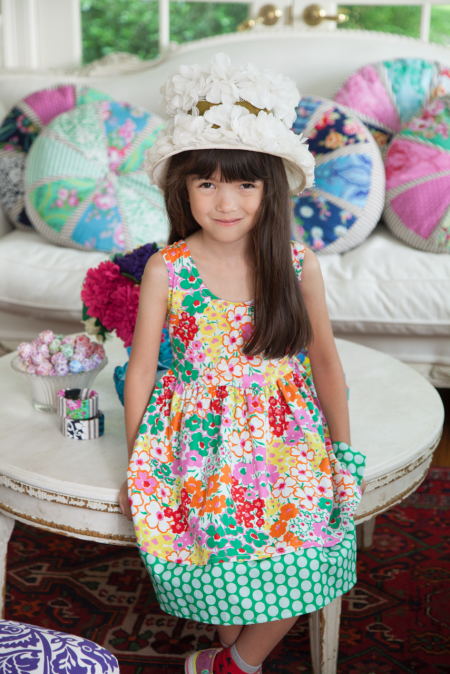
Take a look at some of the different Sally’s made during testing. It’s a such a great layering dress too!
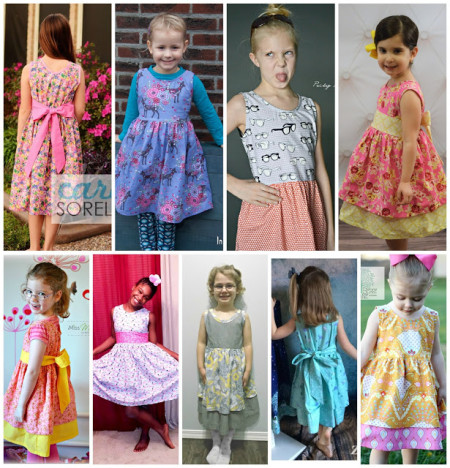
The best part of the newly released Sally is that you are getting ONE wonderfully written (congrats Jeanine Thomlinson for her first pattern with the Sis Boom and Sciencetific Seamstress team) Beginner pattern sized from 3-Months to 14 years. That’s babies, kids and tweens all in ONE loaded pattern. The actual pattern pieces can be printed in your child size-so for Hobbes dress, I printed 2 pages only for a size 3T high neck-bodice. The skirt measurements are found on page 6-and you can adjust the length based on the child height-in my case, a 4T.

Oh, and did you catch how I like to conserve fabric? My beautiful Jennifer Paganelli fabrics, in Good Company Jessie in garnet and Nostalgia Tilly in gold are too dear to me to just stay hidden under my top skirt. What do you think of this little trick?
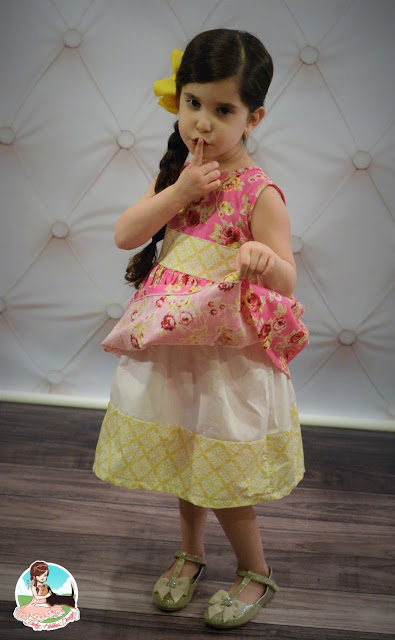
It’s so simple to do this to your bottom skirt, let’s call it underskirt and conserve your designer fabrics. First, I added an extra 0.5 to the bottom skirt length to account for the seam allowance when sewing the two fabrics together. Next, for the fabric (yellow) portion, I looked at the difference between the top and bottom layer-I call it the “seen underskirt” and added 2 inches plus a 0.5 inch for the hem. Total all that and that’s the measurement for the yellow bottom portion of my bottom skirt. To get the top portion of my (white) underskirt, just subtract the previous total from your original underskirt measurement + 0.5 we originally added to the skirt length to account for seam allowance. Easy right?
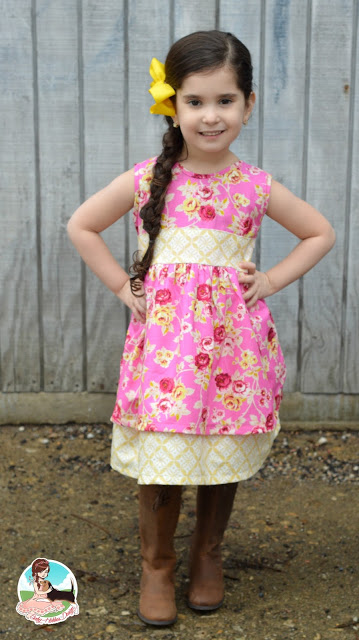
I am loving the simplicity of the SisBoom Sally and I can’t wait to make many more Sally’s for Hobbes to wear year-round. Join me next week for a modified look at the Sally-because you know how I like to stretch my pattern bucks!
Stay tuned for Part 2 next week – modifying Sally for a winter look. Till then, happy sewing!
~Merav @ Baby Hobbes Design
Stop by my Facebook page Baby Hobbes Design and say Hi; or drop me a line @babyhobbesdesign on Instagram.
Shout out to the wonderful Jeanine Thoslinson and all the wonderful Sally testers; it was a pleasure testing with you.
There is a new girl in town and her name is Sally.
This darling little dress is simple and sweet. Make one today for your favorite girl! Sis Boom fans in the Northern Hemisphere can pair it with a long sleeve tee underneath to get through the cooler months to the warmer days ahead. Those of you down under are already enjoying sunny days and warm nights…we are jealous! Currently sitting at my computer desk in a jacket and hat feeling chilled. Brrr!
For a limited time (through this Sunday 1/17/16 at midnight EST) Sally is available at an intro price of $7.50! No need for a coupon code, just shop your heart out here on Sis Boom, and Sally will be added to your cart at $7.50. Happy Shopping!
Can’t wait to see your Sally photos– share them with us on Facebook or Instagram!

copy the code below to
put the Sis Boom badge on your site

copy the code below to
put the Girls World badge on your site


- Archives -
- February 2018
- October 2017
- September 2017
- August 2017
- July 2017
- June 2017
- May 2017
- April 2017
- March 2017
- February 2017
- January 2017
- December 2016
- November 2016
- October 2016
- September 2016
- August 2016
- July 2016
- June 2016
- May 2016
- April 2016
- March 2016
- February 2016
- January 2016
- December 2015
- November 2015
- October 2015
- September 2015
- August 2015
- July 2015
- June 2015
- May 2015
- April 2015
- March 2015
- February 2015
- January 2015
- December 2014
- November 2014
- October 2014
- September 2014
- August 2014
- July 2014
- June 2014
- May 2014
- April 2014
- March 2014
- February 2014
- January 2014
- December 2013
- November 2013
- October 2013
- September 2013
- August 2013
- July 2013
- June 2013
- May 2013
- April 2013
- March 2013
- February 2013
- January 2013
- December 2012
- November 2012
- October 2012
- September 2012
- August 2012
- July 2012
- June 2012
- May 2012
- April 2012
- March 2012
- February 2012
- January 2012
- December 2011
- November 2011
- October 2011
- September 2011
- August 2011
- July 2011
- June 2011
- May 2011
- April 2011
- March 2011
- February 2011
- January 2011
- December 2010
- November 2010
- October 2010
- September 2010
- August 2010
- July 2010
- June 2010
- May 2010
- April 2010
- March 2010
- February 2010
- January 2010
- December 2009
- November 2009
- October 2009
- September 2009
- August 2009
- July 2009
- June 2009
- May 2009
- April 2009
- March 2009
- February 2009
- January 2009
- December 2008
- November 2008
- October 2008
- September 2008
- August 2008
- July 2008
- June 2008
- May 2008
- April 2008
- March 2008
- February 2008
- January 2008
- December 2007
- November 2007
- October 2007
- September 2007
- August 2007
- July 2007
- June 2007
- May 2007
- April 2007
- March 2007
- February 2007
- January 2007
- December 2006
- November 2006
- October 2006
- September 2006