


Meet mother and daughter quilters, Tracey and Chantelle from Australia. We love this sweet story of Tracey and Chantelle quilting togethering, allowing them to slow down and bond in our fast-paced, hectic world.
I’m Tracey, mother to Chantelle, 15 years of age and wife to Shane. We moved from Victoria to the beautiful Swan Valley Region in Western Australia 10 years ago and fell in love with how relaxing it was.
I started quilting after watching my mother make a small quilt for Chantelle when she was a baby. Internet and books were my friends and I’ve learnt from lots of mistakes. The quilts I make have been for my nieces, nephews and of course Chantelle.
In 2012 I discussed with Chantelle learning to sew so that we could spend time together after school and work and talk about how her week had been. She didn’t take to making clothes. In 2013 she made the transition to quilting and hasn’t looked back. Chantelle has made a number of quilts, mainly for herself but has given a couple to friends. Last year we met another West Australian quilter, the one and only Edwina Foskew. This is when we first heard of Jennifer Paganelli and were introduced to the fabrics. Chantelle was gifted some Jenny Eliza and fell in love with the colours and prints. Edwina also encourages Chantelle in all her sewing and fabric buying. She’s yet to use it, waiting for the perfect project.
This year we encouraged Chantelle to create her own facebook page, Chantelle’s Sewing Adventures to show her creations and to be proud of what she does. She’s also started working at Handcrafters House, our local quilt store, gaining more experience from the talented team.
We have been blessed to have a fantastic network of family and friends who encourage Chantelle with her quilting.
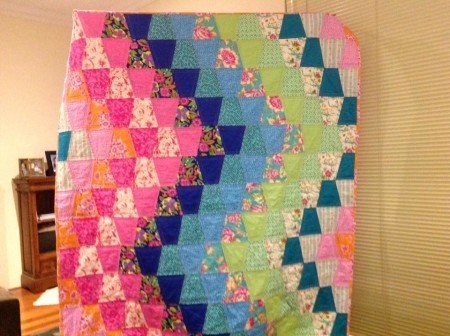
Tracey’s Felicity’s Quilt using Jenny Eliza II
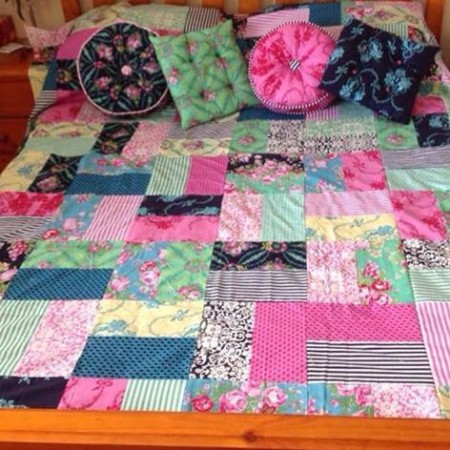
Chantelle’s Beauty Queen rectangle quilt
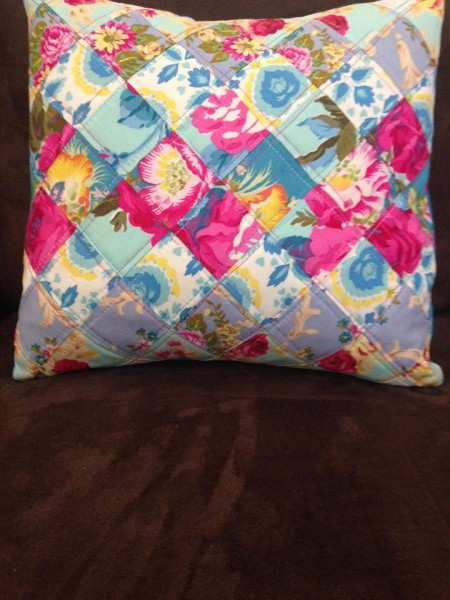
Chantelle’s Good Company Cushion
We are truly lucky to have the uber talented Tamara Harrison show us how she creates her AMAZING fabric flowers. Tamara lives in Western Australia and combines her love of jewelry making, millinery techniques, and floristry skills into a stunning wedding business. We fell in love with her flowers when they showed up on our Instagram feed and she graciously agreed to do a guest blog post.
Be sure to visit Tamara at:
www.tamaraharrison.com.au
Instagram
Facebook
When people ask me what I do, I usually say, ‘I make pretty things’, this is often met with ‘what do you mean, what kind of pretty things?’, so I show them my website or Instagram feed and get an ‘OOhhhh, OOooooo, Ahhh I seeeee’. I have to admit, I LOVE this response because of the joy and curiosity it brings.
Arriving here at the ‘I make pretty things’ place has been a culmination of being trained in Floristry & Art, owning floral design shops, making hundreds of wedding bouquets, lecturing in the subject, coming in and out of the creative terror zone and combining all those skills with new ones to make amazing things for events and home.
I am inspired by all things around me and I constantly have to ‘get the creativity out’ otherwise I go a bit batty (It’s true!).
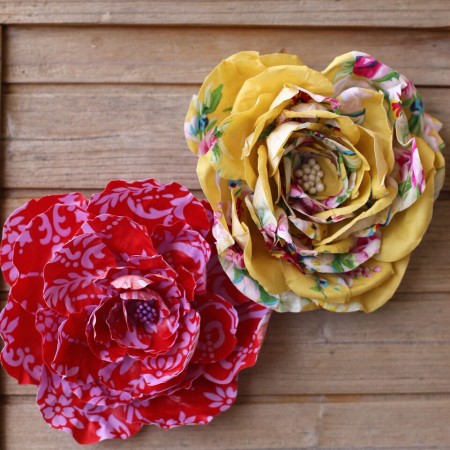
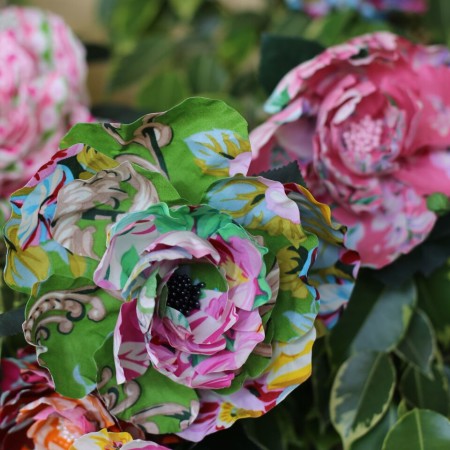
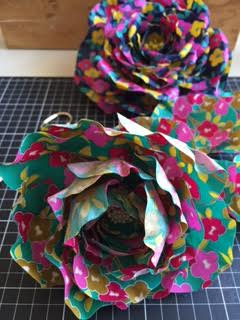
My latest ‘pretty thing’ has been to use my french flower making skills to design fabric flowers. I have become quite obsessed with making them and how beautiful they look in Sis Boom fabric.
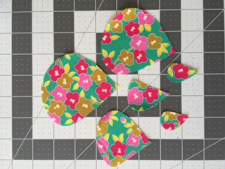
Here are some stages of construction. Each flower takes several hours to complete.
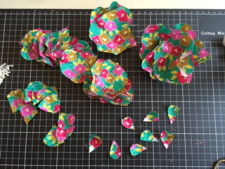
Images 1 & 2: Cut out your petal shape in 5 or 6 sizes small through to large. I cut approx 8 in each size (I may not use them all in 1 flower).
_

_
_
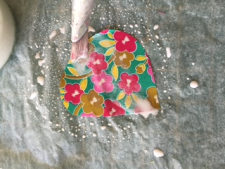
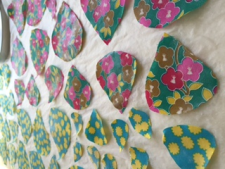
Images 3 & 4: Paint with a fabric stiffener and allow to dry completely. I use my own special formula but watered down craft glue works really well (as long as it dries clear).
_
_
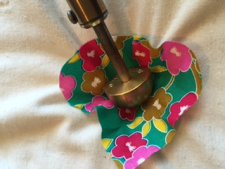
Images 6& 7: Using hot brass flower making tools stretch and shape each petal until it looks three dimensional.
_
_
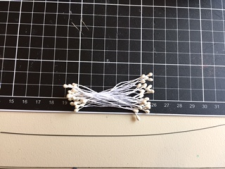
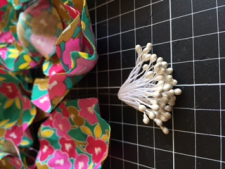
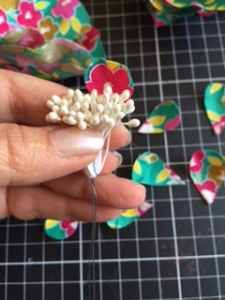
Images 8, 9 & 10: Take a small handful of craft flower stamens and tightly twist a wire through the middle, bending the stamens in half to form a cluster. Sort your petals from smallest to largest. Starting with the smallest petal, take some clear drying craft glue and attach. You can sew your petals on if you prefer.
_
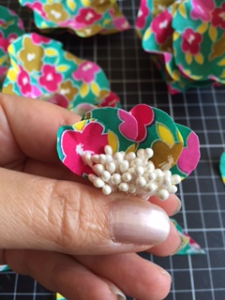
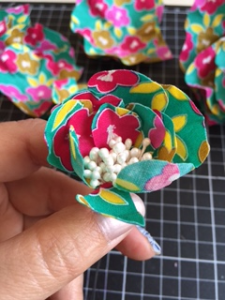
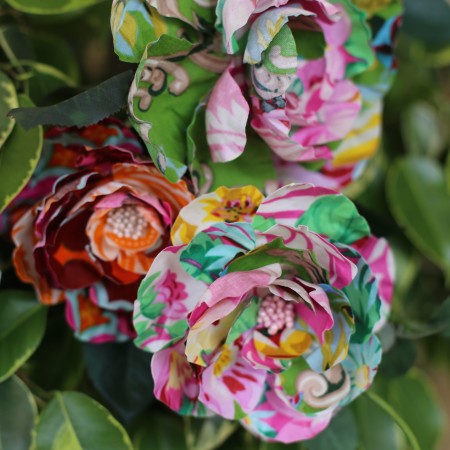
Images 11, 12 & 13: Keep gluing your petals gradually increasing them in size, Make sure to overlap with the previous petal. If in doubt grab a real rose and have a look at how nature arranges them!
_
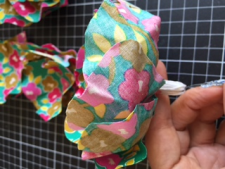
Image 14: Hang completed flower somewhere to dry overnight.

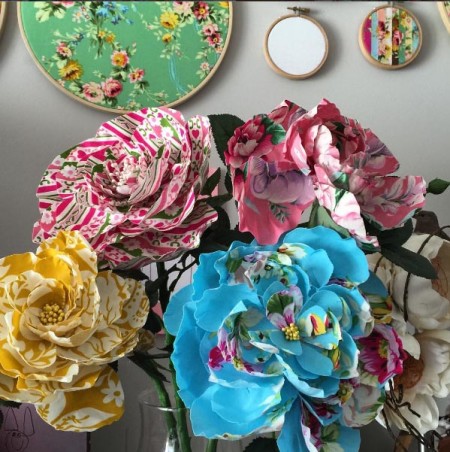
Image 15: Arrange your flower by fluffing up the petals and say WoooHoooo I’ve done it!!
You can then attach a clip, brooch backing or stem depending on how you’d like to use your amazing bloom!
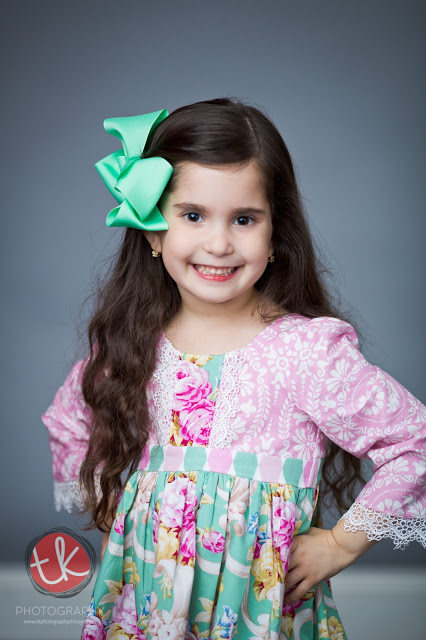
Chicago blogger and seamstress extraordinaire, Merav of Baby Hobbes Design, and her lovely daughter, Hobbes, return for their fourth blog post. We are thrilled to have them back. Enjoy their review of Gabriella Fae made with Sis Boom’s new line, Nostalgia and Merav’s lovely lace embellishments.
Nostalgic About My Gabriella Fae

My best friend since Middle School is Gabriela; well now she goes by Gabi. She transferred into our school in 7th grade and quickly became my bestie. We did everything together-her parents used to call us “an old married couple” because we were inseparable. Though it’s been almost 15 years since we lived in the same time zone, I cherish our friendship and reminisce about our endless days together. One of our favorite past times was to wander around mall (yes, we were in the burbs of Long Island) while talking about clothes and the new style trends.
These days, my partner in fashion is my little 3 and a half foot tall Hobbes. We shop for fabric and talk about how to compliment and mix print. When Sis Boom Nostalgia arrived, with it’s soft pastel hues and large, bold flowers, I knew I wanted Hobbes to be involved in the dress making process. This time around (and with direction) she choose the pattern and the fabric placement. I was ecstatic when she chose Sis Boom Gabriella Fae; it reminded me of my favorite past time with my dear friend, Gabi. Kind of makes me nostalgic!
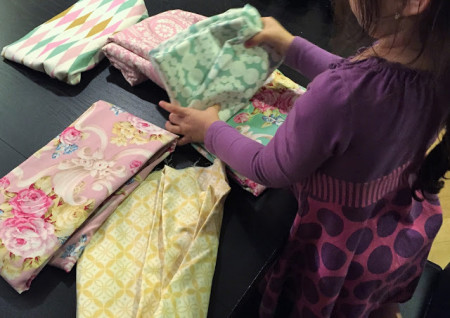
(Hobbes switching the Nostalgia fabrics in and out of Gabriella Fae waistband placement)
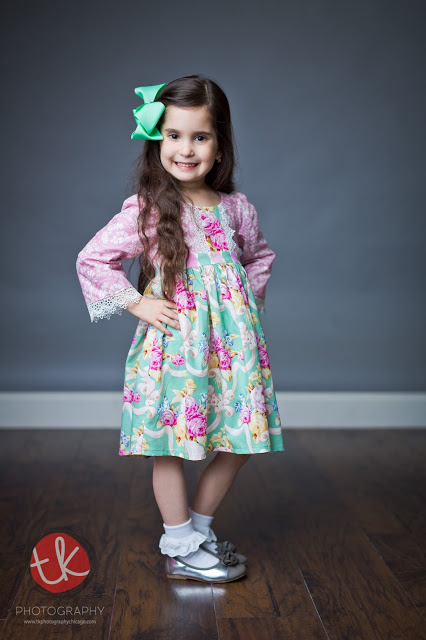
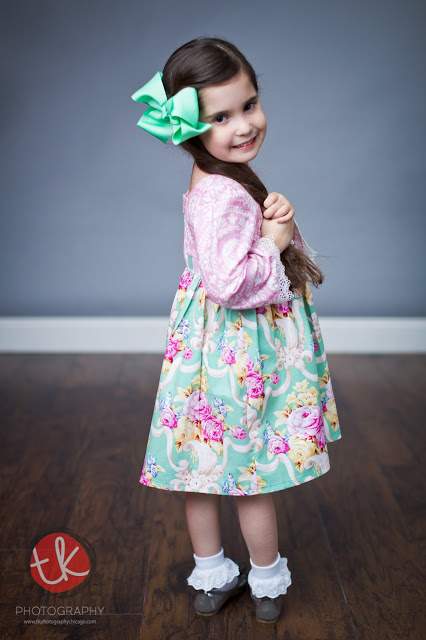
I was delighted when Hobbes chose for us to sew the Gabriella Fae PDF dress pattern. The Holidays are approaching and I wanted her to have a new dress for our Thanksgiving table. The scoop neck, empire bodice and the zipper back, along with the Nostalgia fabrics and the added lace trims (see how-to add the lace trim below) helped shape this dress into a One Of A kind, special occasion dress.

(Since Hobbes measures the same in chest/waist and hips, I chose to shorten my zipper to end at the gathered skirt)
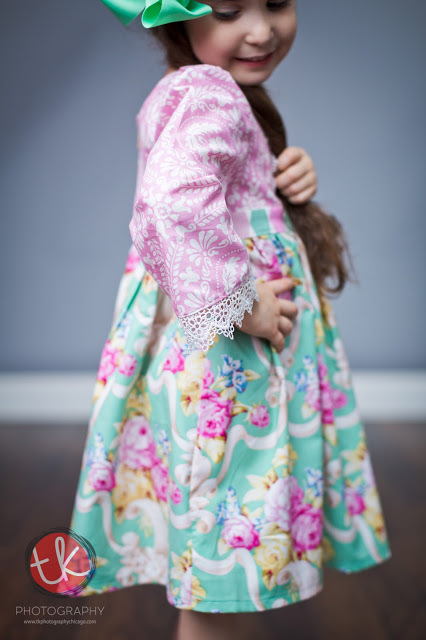
I love that this patterns sports sleeves in multiple lengths-perfect for year round dresses. We chose to sew long sleeve, leaving an inch off so we can add the 1 and 1/4 wide lace to the sleeve edge. The dress can be sewn in multiple lengths too. If you have your kid handy, you can measure down from the waist to your desired length. For my daughter, with a waist 21 and height 41.5, I chose to cut the 3T in the fully lined flat bodice and 16 inch length for the skirt.

The dress bodice can be made using 2 different cuts. One is a smooth outer layer, like the one Hobbes and I made cut in order to add trim in the center. You can also chose the second option for a gathered front bodice for the perfect ruched look. There is even an option to add a bow at the waistband. So many possibilities!

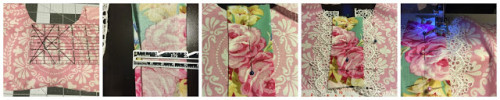
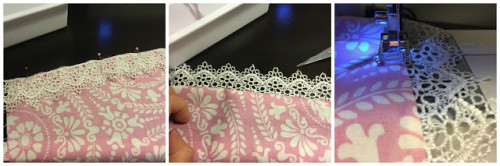
To create the trim for a flat bodice overlay and the sleeves, please follow the instructions below:
Looking at the picture below, and starting from LEFT:
After you cut your flat bodice piece, measure how wide of an overlay you would like. For Hobbes size 4 bodice, I cut roughly a 2 and 1/4 piece and added an inch to the length. Make sure your design is centered.
Next, fold your edges under-1/4 on each side. Find the center of your bodice and place the overlay on top. Pin in the center.
Cut two strips of lace-I like to cut about an inch longer so I can then match the curves on both sides. Tuck the lace under the folded edge, 1/4 of an inch on each side. Pin and sew.
To add a lace trim around the sleeves, see picture below. Staring from the LEFT:
Take your raw end of your sleeve, right side up. Lay your lace piece right side down. Pin and Sew with a 1/4 inch seam allowance.
Fold over the lace, so that the seams are under. Press and top stitch 1/8 of an inch to tack it down.
*I added the lace before I sew the sleeves closed. It’s much easier that way. When you do close your sleeves, make sure you match the lace and the sleeve hem.
There you have it! Now you can embellish your Gabriella Fae’s sleeves and bodice just in time for the holidays. I hope you love it just as much as Hobbes and I do. And if you are sewing with your mini-me, share your pictures here.
Happy Sewing,
-Hobbes and Merav @ Baby Hobbes Design
As always, I love hearing from my crafty friends. Follow me at Baby Hobbes Design on Facebook or Instagram for updates, pattern review, One of A Kind dress-sales and giveaways.
Special thanks to my friends at TKPhotography Chicago for these gorgeous card-ready photos.
And if you don’t own it, get your copy of Sis Boom Gabriella Fae Here
It’s rolling into the summer season for all our Sis Boom Australia fans, so we couldn’t resist sharing this cutie in a lovely sundress featuring Marcella fabric from the Circa line when she showed up on our Instagram feed recently. Amaya and her mom, Miquita, live in the Hunter Valley of NSW, Australia. Miquita owns Damaya Designs, featuring handmade children’s clothing as well as patterns/tutorials for children’s activity items.
Miquita sewed this dress using the new Cross Bow Dress designed by BOO! Designs for the latest edition of One Thimble, an online quarterly e-zine out of Australia. Such a darling dress. You can find the PDF pattern here. Sew one today using the new Nostalgia line. Just sayin’….
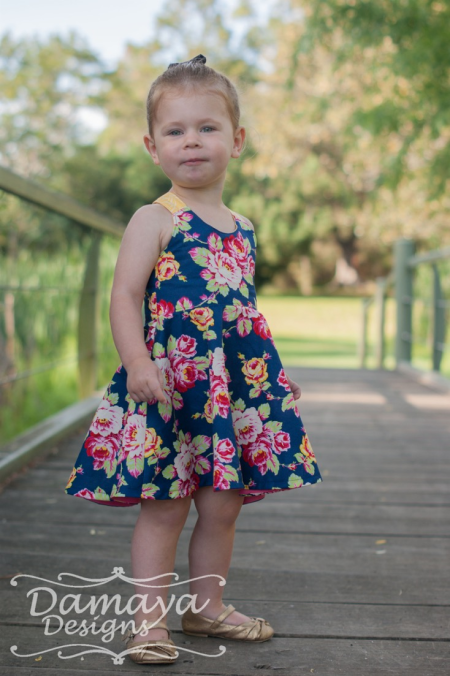
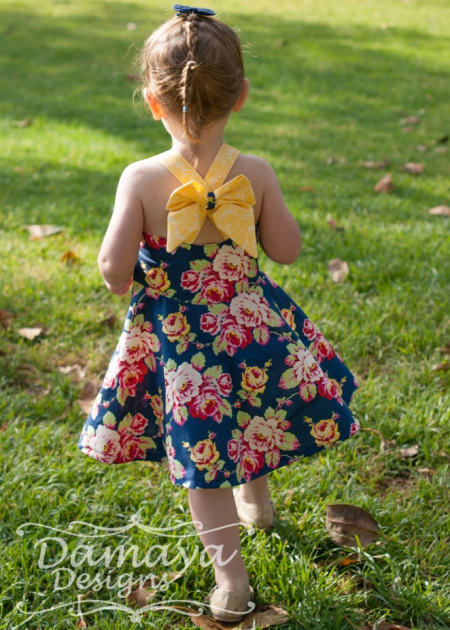
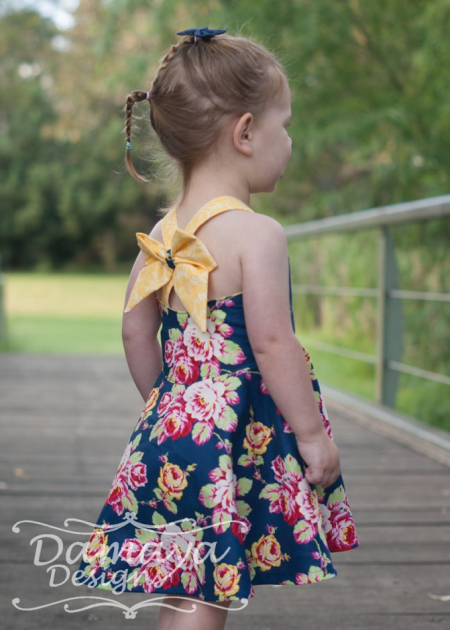
Thanks for sharing with us Amaya and Miquita. Be sure to follow Damaya Desisgns on Facebook and Instagram.
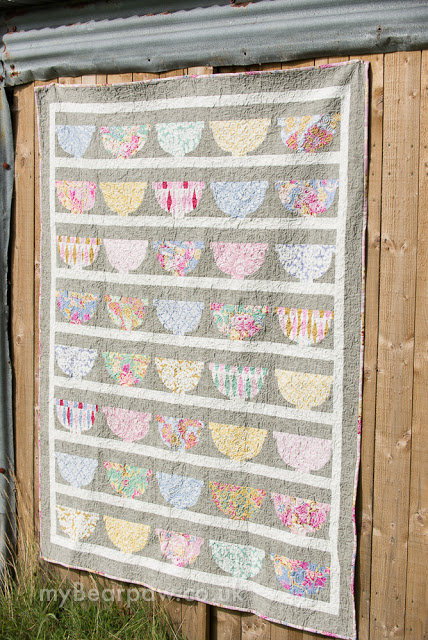
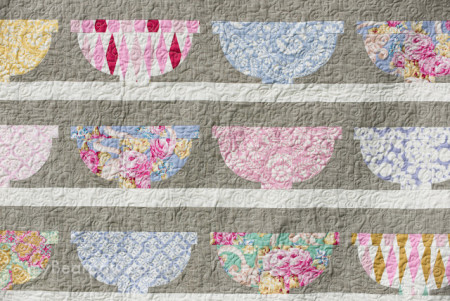
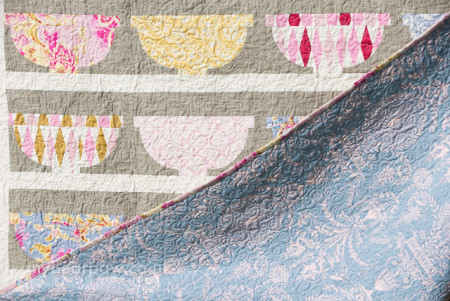
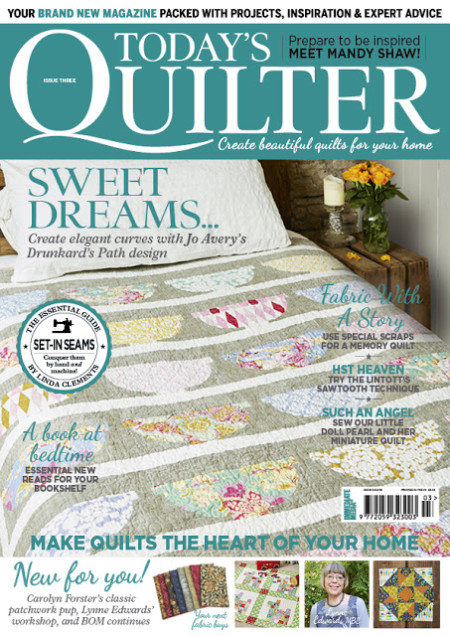
Uber talented Jo Avery has done it again with this masterful quilt using Sis Boom’s newest line Nostalgia. The quilt debuts on the cover of Issue 3 of Today’s Quilter available now. Pick up a copy today to learn how to make this gorgeous quilt. Jo uses Nostalgia for the bowls on the front and Elyse in Pink from the Caravelle Arcade line for the back. It reminds me a bit of vintage Pyrex bowls which have been a super hot collectable the last few years. Love how this quilt is modern and traditional at the same time. Thanks Jo, from bringing the Nostalgia line to life!
What have you been making with the Nostalgia line? Share with us on Facebook and Instagram. We love hearing from you.

copy the code below to
put the Sis Boom badge on your site

copy the code below to
put the Girls World badge on your site


- Archives -
- February 2018
- October 2017
- September 2017
- August 2017
- July 2017
- June 2017
- May 2017
- April 2017
- March 2017
- February 2017
- January 2017
- December 2016
- November 2016
- October 2016
- September 2016
- August 2016
- July 2016
- June 2016
- May 2016
- April 2016
- March 2016
- February 2016
- January 2016
- December 2015
- November 2015
- October 2015
- September 2015
- August 2015
- July 2015
- June 2015
- May 2015
- April 2015
- March 2015
- February 2015
- January 2015
- December 2014
- November 2014
- October 2014
- September 2014
- August 2014
- July 2014
- June 2014
- May 2014
- April 2014
- March 2014
- February 2014
- January 2014
- December 2013
- November 2013
- October 2013
- September 2013
- August 2013
- July 2013
- June 2013
- May 2013
- April 2013
- March 2013
- February 2013
- January 2013
- December 2012
- November 2012
- October 2012
- September 2012
- August 2012
- July 2012
- June 2012
- May 2012
- April 2012
- March 2012
- February 2012
- January 2012
- December 2011
- November 2011
- October 2011
- September 2011
- August 2011
- July 2011
- June 2011
- May 2011
- April 2011
- March 2011
- February 2011
- January 2011
- December 2010
- November 2010
- October 2010
- September 2010
- August 2010
- July 2010
- June 2010
- May 2010
- April 2010
- March 2010
- February 2010
- January 2010
- December 2009
- November 2009
- October 2009
- September 2009
- August 2009
- July 2009
- June 2009
- May 2009
- April 2009
- March 2009
- February 2009
- January 2009
- December 2008
- November 2008
- October 2008
- September 2008
- August 2008
- July 2008
- June 2008
- May 2008
- April 2008
- March 2008
- February 2008
- January 2008
- December 2007
- November 2007
- October 2007
- September 2007
- August 2007
- July 2007
- June 2007
- May 2007
- April 2007
- March 2007
- February 2007
- January 2007
- December 2006
- November 2006
- October 2006
- September 2006