


Merav of Baby Hobbes Design is back with Part II of her take on the new Sally dress, this time with long sleeves. Sally is the perfect year round dress and super simple for the beginner sewist. We hope you give her a try and don’t forgot to share your creations with us on Facebook and Instagram!
Sally Part II, Long Sleeves for the Win
I am so happy to be back with part II of the Sally Dress tour, and this time I am here to share with you an easy trick for a year-round dress. I am always in the market for new and easy beginner patterns-and, as we discussed in last week’s post, Sally is just that! But how about Sally with sleeves?
I adore the tank style, pull-over Sally dress! Here in the Windy City, we are still in LONG sleeves for a few more months. And a versatile pattern means ‘A Win’ for me-to sew year round.
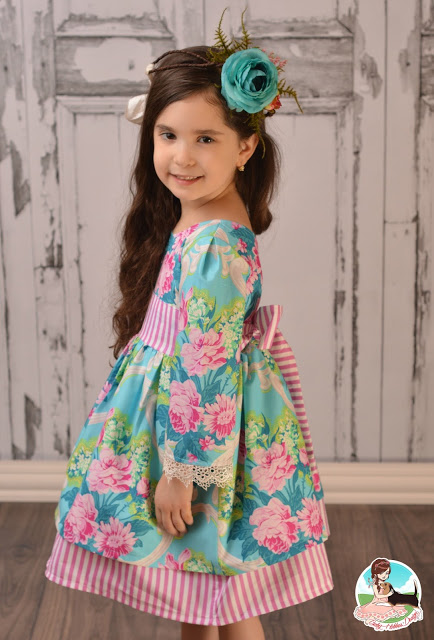
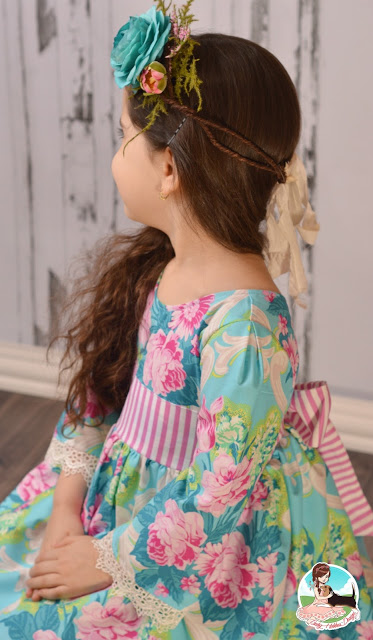
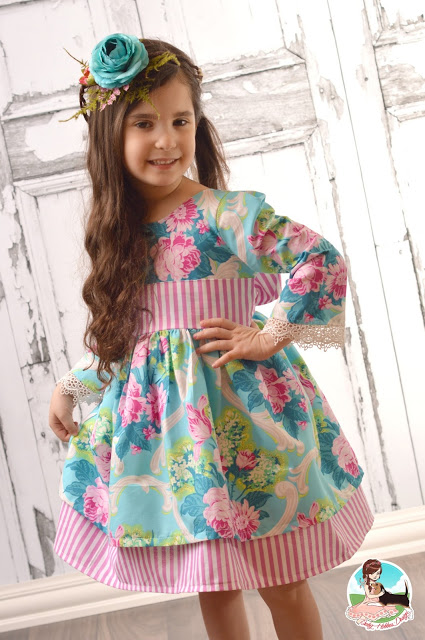
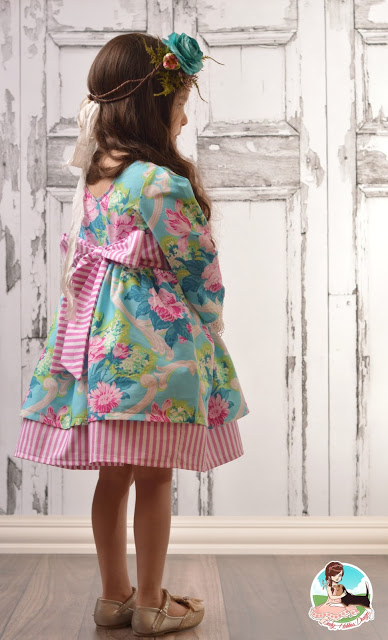
This week I let Hobbes play around with my beautiful Sis Boom fabric collection, and I was in heaven when she pulled out Caravelle Arcade’s Jessica in Blue and Beauty Queen’s Katie stripe in Pink. My head (and heart) went straight into Valentines mode, and we decided this will be her dress for our big Valentines fundraiser next month.
You are going to love how easy it is to take Sally and change her up to meet the demand of the weather. To achieve this look, you will need the Gabriella Fae pattern for its bodice and sleeves. Also, if you are a sucker for lace like me, check out my November Blog here for adding these pretty darling details.

Once you have both the Sally and Gabriella Fae bodice pieces cut out to size, go ahead and follow the steps here in order to change the arm cycle of Sally to adjust for the sleeves.
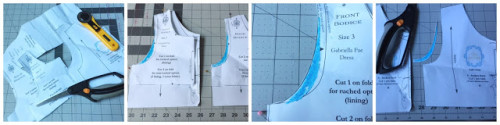
Looking at the pictures above, from left to right. First, cut your pattern size in both dress bodice to size. Next, lay the Gabriella Fae front bodice on top of the Sally front bodice. Match the shoulders at the arm cycle edge. For this quick transformation, I am not changing anything else in the pattern–just the curve of the arm. As you can see, I shaded/colored in the difference in arm curve directly on the Sally for easy cutting. Once you have your markings on the front (repeat with the back bodice), go ahead and cut off the markings so your Sally can accept Gabriella Fae sleeves.
***Please note that you can do this trick with most of your patterns. Always remember to change the arm-cycles and note the difference in the shoulder alignment.
Next, sew your sleeves. You may choose to follow the Gabriella Fae directions to add your sleeves. Because I have experience sewing that pattern, I decided to change it up a bit and add a pleat at the top shoulder instead of a gathered puff. I’ll be honest, it was an experiment, but I had nothing to lose–it’s all in the pinning.
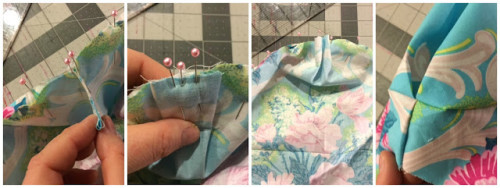
It’s so easy to add this small detail. First, fold your sleeve in half and stick a pin in the top middle. Then, starting from the edge, pin your sleeve to the bodice until you are at the halfway point/reached your shoulder seam on the bodice. Then move to the other side of the sleeve, starting from that end, pinning till you reach the middle of the bodice.
Looking at the pictures above, from left to right: grab your excess sleeve material in the center (bout 3-3,5 inches) and make sure that the sleeve is pinned perfectly up to the shoulder seams. Next, you will want to flatten the access sleeve and perfectly align it with the center seam on the shoulder. Pin in down and check it on both sides to make sure the pleat center is aligned with shoulder seam. Once you are happy, sew it up to the bodice.
Once you have added on your sleeve, continue with the Sally directions. Just remember when you are sewing your front and back bodice closed, you are starting at the sleeves and sewing down.
And that’s how I got Hobbes this new Sally. It’s an easy beginner, pullover darling dress pattern.Now show me how you transform your Sally dress. Get your copy of Sally and Gabriella Fae here.
Special thanks to my talented friend Julie over at the Little Sparrow Bows for her perfectly made to match hair halo.
Like my backdrop? Temperatures have been in the teens here and I just didn’t have the heart to ask Hobbes to pose outside. Loving my new Big Time Prints (formally Bubblegum Backdrops) for a quick and warm photo-shoot.
Till next time, happy sewing!
~Merav @ Baby Hobbes Design
Leave a Reply


- Archives -
- February 2018
- October 2017
- September 2017
- August 2017
- July 2017
- June 2017
- May 2017
- April 2017
- March 2017
- February 2017
- January 2017
- December 2016
- November 2016
- October 2016
- September 2016
- August 2016
- July 2016
- June 2016
- May 2016
- April 2016
- March 2016
- February 2016
- January 2016
- December 2015
- November 2015
- October 2015
- September 2015
- August 2015
- July 2015
- June 2015
- May 2015
- April 2015
- March 2015
- February 2015
- January 2015
- December 2014
- November 2014
- October 2014
- September 2014
- August 2014
- July 2014
- June 2014
- May 2014
- April 2014
- March 2014
- February 2014
- January 2014
- December 2013
- November 2013
- October 2013
- September 2013
- August 2013
- July 2013
- June 2013
- May 2013
- April 2013
- March 2013
- February 2013
- January 2013
- December 2012
- November 2012
- October 2012
- September 2012
- August 2012
- July 2012
- June 2012
- May 2012
- April 2012
- March 2012
- February 2012
- January 2012
- December 2011
- November 2011
- October 2011
- September 2011
- August 2011
- July 2011
- June 2011
- May 2011
- April 2011
- March 2011
- February 2011
- January 2011
- December 2010
- November 2010
- October 2010
- September 2010
- August 2010
- July 2010
- June 2010
- May 2010
- April 2010
- March 2010
- February 2010
- January 2010
- December 2009
- November 2009
- October 2009
- September 2009
- August 2009
- July 2009
- June 2009
- May 2009
- April 2009
- March 2009
- February 2009
- January 2009
- December 2008
- November 2008
- October 2008
- September 2008
- August 2008
- July 2008
- June 2008
- May 2008
- April 2008
- March 2008
- February 2008
- January 2008
- December 2007
- November 2007
- October 2007
- September 2007
- August 2007
- July 2007
- June 2007
- May 2007
- April 2007
- March 2007
- February 2007
- January 2007
- December 2006
- November 2006
- October 2006
- September 2006

