March 4, 2014 by Madeline Rhodes
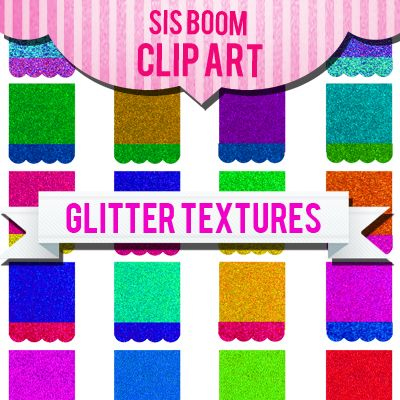
This is the cleanest glitter you’ll ever work with. No glue, no wait time, no glitter stuck on your face (not that that’s a bad thing!)… just print and play!
Oh, and did we mention that it’s a FREE download?!
Consider this Glitter Textures set a gift – we want you to print, cut and have FUN! The pieces are large enough to create a banner, or can be made tiny enough to design little table settings, cupcake flags, or love notes. Let your imagination run wild!
Click HERE or on the image below to download your glitter kit. The zip file will go to your downloads folder. Open it up and get going! Work with the files digitally or print them for some paper fun.
Tags: free, Glitter, PDF download
Categories: Clip Art, Sis Boom •
Comments Off on Glitter at your fingertips
October 29, 2013 by Jennifer Paganelli
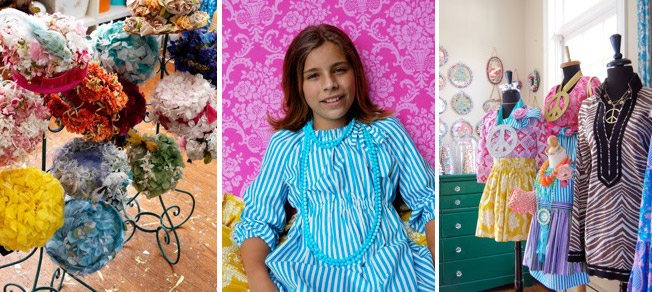
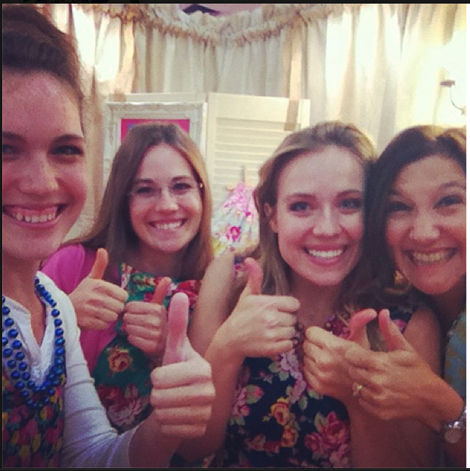
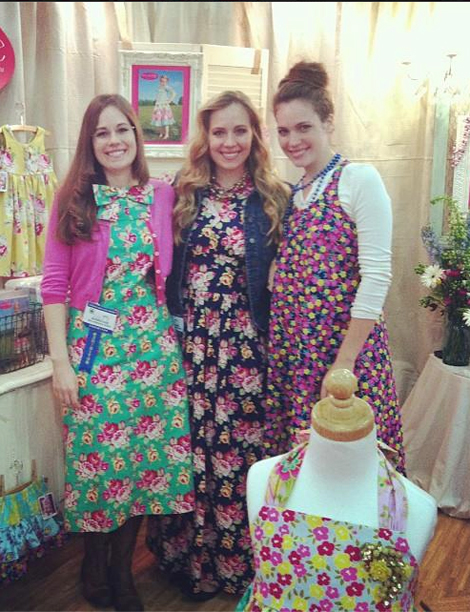
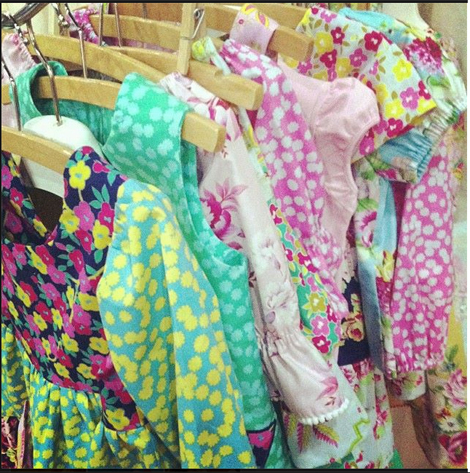
Wow I am the luckiest girl I know!!! This past weekend I was unable to attend Quilt Market due to our imminent show here back at home. I was fortunate to be blessed by lovely friends who really did an outrageous job of sharing Lucky Girl with all of you. First of all to know the Long Ladies of Marie Madeline Studios is to love them. Hearts as big as the eye can see. You just want to be around them and be smothered by there openness to love you right back. I am so touched by their gifts and there uncanny ability to make beautiful things. This year with appliques and stunning clothing and fierce patch working I can only pray that they hit the roof in sales!! My understanding was that the booth was always crowded!! I want to thank Freespirit for supplying them with Lucky Girl so they could have everything ready for market. Long Girls what can I say..except your beauty out shined everything ! I will always be your fearless cheerleader and always here for you. Jenny thanks for your satellite reports from the Convention center in Houston you did an amazing job!!! So please venture over they have lots of Lucky Girl in stock and Patterns that will bring a smile to your soul.!!
Tags: adult patterns, Children's fabric, children's Patterns, colorful fabrics, Lucky Girl, Marie-Madeline, quilting fabric
Categories: accent pillows, Austalia, Australia, baby room, backpacks, Betty Ann pattern, Bow Ties, boys long sleeved pattern, Carly Bubble romper, Cathy Pattern, Challange, class time, Clip Art, Collage, college gifts, Colorful Quilting, contest!, facebook, fat quarters, February, felt, Finland, girls dresses., Girls Sewing!!, Girls World, Happy Home, Happy Land, Hearts, Items for sale, kits, Lucky Girl, Make my day!, patchwork, Patterns •
2 Comments »
July 23, 2013 by Jennifer Paganelli
yes we are open..letting go of lots of product, many handmade right here in CT.


See anything you like, please inquire, we are here to help!
Tags: accessories, clothing, jewelry, local Wilton CT, Sale
Categories: Agnes Tunic Girls World, Austalia, Bow Ties, boys, canopy, Carly Bubble romper, Challange, Chandler, chunky zebra, Circa, Clip Art, Collage, college gifts, Craft, crafting, crafting classes, Crazy Love, Earth Angels, embroidered pillows, embroidery, english paper piecing, english paper piercing, ETSY, fat quarters, Happy Home, Happy Home Chronicle Publication, Happy Land, Heirloom quilts, Holiday Show, Home Dec product, hook pillows, In The News, Items for sale, Jamie Dress PDF, Josie Dress, June Tailor fabric sheets, Kenilworth Place, modpodge, Mollie Makes, Mother's Day Crafts, old wallpaper, ornaments, outdoor fabric, Patterns, picnic, Rosetta Bag, ruffles, sale, sale embroidered pillows, scraps, Sequined Birdies, Sis Boom in the world, Sis Boom Party, Sis Boom patchwork, Sis Boom Pattern Co., Sis Boom Patterns, stash, Stationary, Stitch Craft Create, Studio, West Indies Toile, Westminster, whole cloth, wholecloth Quilts, workshop •
7 Comments »
June 27, 2013 by Jennifer Paganelli
I did it, I announced Lucky Girl on Facebook. It’s always thrilling to launch a new line but it can be terrifying simultaneously!! You just always want everyone to be happy and that you continue to raise the bar for yourself. Achievement can never really be measured so it has to come from within. I like this line so much and know that you will have so much fun putting the designs together. You know how much I love seeing your work and if I can help you launch a little biz so you can stay home with the kids I am happy to do so!!!! So I hope you are enjoying the summer it can be difficult juggling kids and your biz but take heart in knowing it will come when you are ready and not before. Savor the notion that you are right where you are supposed to be!!

Tags: Lucky Girl
Categories: American Patchwork and Quilting Radio, Australia, Betty Ann pattern, Bow Tie Quilt, Bow Ties, boys, boys long sleeved pattern, boys shirts, Cathy Pattern, charm packs, Circa, Clip Art, Collage, Country Living Fair, Craft, crafting, Craftsy, Crazy Love, ETSY, facebook, fat quarters, February, Finland, Finnish, Flickr, floral fabric, flower bouquet, garland, girls dresses., Girls Sewing!!, Halter Pattern, hand sewing, Happy Land, Hawthorne Threads, Love, Lucky Girl, Lucy Halter, Made By You!, marissa dress, old wallpaper, outdoor fabric, patchwork, pillows, pincushions, pom poms, quilting fabric westminster, quilting stores, redecorate, Rosetta Bag, Sequined Birdies, Sew Beautiful, sewing, Sis Boom Carly Bubble Romper, Sis Boom Crafts, Sis Boom Pattern Co., Sis Boom Patterns, Sis Boom Room, stash, Stationary, Stitch Craft Create, Ticking, Valentine Love, vintage florals, vintage reproduction, Westminster, wholecloth Quilts, women's sewing, workshop •
13 Comments »
April 28, 2013 by Madeline Rhodes
Hey everyone! I’ve got a super quick & simple project for today’s Sis Boom Clip Art Series: A Faux Lighted Mirror!

For this project we’ll be using Sis Boom’s Glitter Garland Circles

All you’ll need is this clip art file, some scissors, and adhesive dots.

Start by printing out the clip art onto glossy photo paper and cutting out each circle.

Grab some adhesive dots, adhere to the back of the circles, and start sticking! It’s as easy as that!!


If you want your mirror to have a more “authentic” look of lights, you can choose to just use the gold glitter circles. Line the top of your mirror with the large circles to simulate vanity lights. (You can even line the bottom with the small or large dots if you want!)

Or you can use just pink, or alternate between the two colors. They could also just be used as a decorative border around a mirror – the possibilities are endless!
Tags: Clip Art, Glitter, Jessica Huizenga, Love Colorful, Sis Boom Clip Art
Categories: Clip Art, Love •
1 Comment »
April 12, 2013 by Madeline Rhodes
HI Sis Boom Friends! Ok.. If you’ve seen our Clip Art and wondered, hmm.. How can I use that?! .. then this one’s for you.. (as is EVERY Friday post, shared by the lovely & oh so talented Jessica of Love Colorful!)
psssst… If you’re not a Photoshop gal or guy, then maybe this one’s not for you.. but all of the other demos by Jessica certainly are!
In this post, Jessica does an AMAAAAZING job walking you through Photoshop… explaining very slowly and carefully how to manipulate this file digitally. We encourage you to try- it’s not as scary as you may think! promise! Thanks Jessica for the awesome post.. pssst.. How beautiful is she?! (scroll to the bottom!) … Enjoy!
Take it away, Jessica!…
Hi guys! For this week’s Sis Boom Clip Art project I’ve got something a little different for you – an actual digital project using the digital clip art! Shocking, I know! hah Anyways, bust out your copy of Photoshop, and let’s get cracking! For this project we’ll be using one of the pieces from the Love Ephemera clip art file.


First up, open the digital clip art file (.png) and a photograph you would like to use in Photoshop. (P.S. you can click any of these screenshots I’ll be using to show them a little bigger if you need to! Also, if I mention any keyboard shortcuts, I’m using a Mac – things may differ slightly on a PC, but will be the same basic concept)

Using the “Rectangular Marquee Tool” on the left hand side of your screen (the dotted rectangle icon below the arrow at the top) select just the frame in the bottom right corner. Then copy the selection (“Edit > Copy”)

Now go to “File > New” to open a new document. By default, since you have a selection copied to your clipboard, it should come up as showing a preset for “Clipboard” (This will automagically size your new document to fit your selection). Hit OK!

And paste your selected image into your new document.

At this point, if the photograph you chose to use is vertical, leave your canvas the way it is. If your photo is horizontal, however, go to “Image > Image Rotation > 90 CW”

Ok, now for the fun part – we get to use the Polygonal Lasso Tool! You select the tool, then click ‘points’ in which to make your selection. Start from one of the inside corners of the center image, and keep clicking along the edge – basically trace the inside frame. While the little cherub dude is cute and all, you want to add your own shining face, right? (Or perhaps a loved one, your pet gerbil, or a pretty scene)

Once you’ve gone all the way around the middle of the frame, you’ll see the marquee dotted line wiggling all over the place. (You’ll notice a little circle appears at the corner of the tool once you’ve made it all the way around to the beginning and connect your lines)


Now we want to invert the selection, so go to “Select > Inverse”

Next we have to create a layer mask, so click the icon at the bottom of your layers pane that looks like a circle inside a rectangle. Click that and you should get something that looks like the picture above.

Next add a new layer. Then go to the photograph file you want to use, select all, copy, and paste it into your frame file.

Use the “control button + T” (or “Edit > Free Transform”)to fit the image (it will give you a box to resize it with). Hold shift and drag one corner of the photo until it is the size you need to fit in the frame. Then simply save your work, and bada-bing bada-boom: a super cute digital picture frame!
SEE MORE at LOVE COLORFUL! Go on! You’re going to LOVE IT.. LIKE, BIG TIME!
Tags: Clip Art Downloads, digital files, Jessica Serra Huigenza, Love Colorful, Love ephemera, Sis Boom Clip Art
Categories: Clip Art, Craft, crafting •
Comments Off on SIS BOOM CLIP ART SERIES: DIGITAL EPHEMERA FRAME
April 5, 2013 by Madeline Rhodes
LOVING our Fridays!!! What a treat to have our girl, Jessica of LOVE COLORFUL all up in hurr on the Sis Boom blog! Take it away, Jessica! Pssssst… Jessica’s beautiful wedding was just featured in Mingle Magazine— you HAVE to check it out. WOWZA!
Hey there! Ok, I know you’ve seen a bunch of trees up on here, but hey, they are just so darn easy and fun to make I can’t help myself! Using Sis Boom Clip Art we’ve already made a Sequin Flower Tree and a Striped Heart Tree, but this week we’re going with a Glitter Scallop Tree!

As you probably have guessed by now, we’re using the Glitter Textures Clip Art (yup! the same ones we used for the Happy Home Banner, except this time we’re using the smaller, original sizes!)
Since we’ve been through this quite a few times, I think we can get by with just a few pictures – sound good? Simply print your clip art on 8 1/2″ x 11″ paper (either plain white paper & glue or you can use sticker backed sheets to help the squares stick to each other)


All you’ll really need is a tiny bit of patience!
Tags: Clover, Craft, DIY, DIY project, Downloadable, Glitter, Jessica Serra Huigenza, Love Colorful, Scallop, Scallop Glitter Squares, Sis Boom Clip Art
Categories: Clip Art, Craft •
Comments Off on SIS BOOM CLIP ART SERIES: GLITTER SCALLOP TREE
March 29, 2013 by Madeline Rhodes
Hey everyone! Happy Friday! You know what that means – a brand new Sis Boom Clip Art project!!

This week we’re using Sis Boom’s Striped Hearts Clip Art files to make a quick & colorful decoration.

A similar idea to the Sequin Flower Tree we made a couple of weeks ago, this one is just as easy!

First glitter your Styrofoam tree – just use some white glue and any color glitter that tickles your fancy.
Follow the instructions in this Confetti Heart Charm Bracelet post for printing your striped heart digital files on Shrinky Dink paper. (Remember to make sure it is the kind that can be used in an inkjet printer!)
Then cut our your hearts, shrink ’em in the oven, and use some colored straight pins to attach them to the tree – just like putting ornaments on!


Imagine making a few of these in all different colors and sizes and decorating your mantle! Great for Valentine’s Day, but also just for a happy, colorful room accent that would be perfect any day of the year!
Check back here next Friday for one more take on a Sis Boom Clip Art tree!
Visit LOVE COLORFUL for all things GLITTERY, COLORFUL, and LOVELY!
Tags: Clip Art, Jessica Serra Huigenza, Love Colorful, PDF Clip Art, Sis Boom Clip Art, Striped Heart Tree
Categories: Clip Art, Craft, crafting, crafting classes, Digital downloads, Uncategorized •
Comments Off on SIS BOOM CLIP ART SERIES: STRIPED HEART TREE
March 22, 2013 by Madeline Rhodes
SIS BOOM CLIP ART SERIES: HAPPY HOME BANNER
What better way to spend a happy Friday than to make a Happy Home Banner that’s full of color, sparkle, and happiness??

This week we’re taking Sis Boom’s Glitter textures Clip Art and turning it into something magical!

The best part about these little guys? There are a TON of colors to choose from, so you can coordinate to almost any palette.

First we have to take our scalloped squares and make ’em BIGGER. To do this, create a new file in Photoshop (or whatever photo editing program you like to use) that has a width of 11 in and a height of 8.5 in. Copy and paste two separate scallop squares into your new document. You can really make them any size you’d like, but for mine I found a width of 355 px and height of 415 px worked well to fit two squares on each page (shown with the blue arrow above). Print it out on a regular piece of paper (or glossy photo paper for a shinier version) – just be sure to “scale to fit” the page when printing so nothing gets cropped out! Repeat until you have the proper number of squares (For “Happy Home” you will need 9!)

You’ll also need to cut out some letters! I decided to dust off my Cricut machine, but you can either add in the letters digitally before you print, write them on with marker yourself, or print out letters to cut out. You’ll also need some glue & scissors to cut out your squares and glue on the letters!

To help hang up your pretty little banner, you’ll need some ribbon or sequin strands and some clothespins. I just took some regular old clothespins, covered one side in white glue, and sprinkled on some glitter to keep with our colorful, sparkly theme. Feel free to embellish any way you’d like! (For some of you, part of the appeal of these digital scallop squares might be the fact they have the pretty look of glitter, without all the mess. If that’s the case, you can even print out some extra squares and cut out strips to glue on your clothespins)


Make a loop at each end of your ribbon, use a couple of push pins, and voila! Your home is instantly happier 🙂 🙂 🙂
Pop over to LOVE COLORFUL to see Jessica’s finished product!! Come on, ya gotta! You’ll LOVE IT!
Tags: Banner, Clip Art, Happy Home, Jessica, Love Colorful, Scallop Glitter Squares
Categories: Banner, Clip Art •
2 Comments »
March 15, 2013 by Madeline Rhodes
It’s Friday!! Happy Friday!! Here’s our girl Jessica of Love Colorful, with an awesome place card holder project using our Sis Boom Spring Egg CLIP ART download!
These eggs are an awesome diy project for the little kids when you want to stay away from messy egg dying & drying..
Hey everyone! For this week’s Sis Boom Clip Art Series I’ve got a quick & easy project that’s perfect to jazz up your Easter table!
 Featuring:

For this project, you will need:

–Sis Boom Spring Eggs Clip Art file (printed out on glossy photo paper with names added – you can do this digitally before you print, or use a permanent marker/stickers to add them in after)
-empty toilet paper rolls
-colored paper
-hot glue
-Easter grass
-tissue paper, ribbon, and assorted candies/confetti/trinkets

Start by cutting out a piece of colored paper to fit around the TP roll. Add a strip of hot glue where you start, and some where you finish so the paper completely covers the roll. Use a variety of colors to match your decor!

Next take some Easter grass and hot glue some to one side of the roll. (and cut out your eggs!)

Glue your eggs on next!

Take a piece of decorative tissue paper and fill with an assortment of treats and confetti. Roll it up, tie both ends with some ribbon, and you’re good to go! How easy was that? 🙂
THANKS JESSICA!! … Now go to Love Colorful to see the beautiful finished product that Jessica made. You have a couple weeks to make yours… and $5 gets you Sis Boom eggs for life! Keep them and print them every year!
Have FUN!
Tags: Clip Art, Colorful eggs, DIY, Easter, Love Colorful, Sis Boom Eggs, Spring
Categories: Clip Art •
Comments Off on SIS BOOM CLIP ART SERIES: SPRING PLACECARD HOLDERS