January 15, 2014 by Jennifer Paganelli
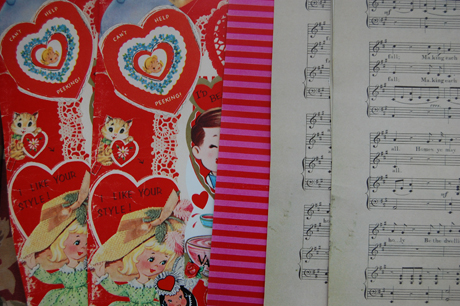
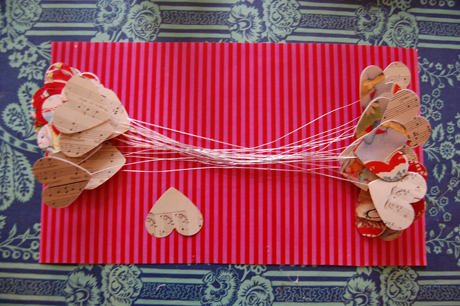
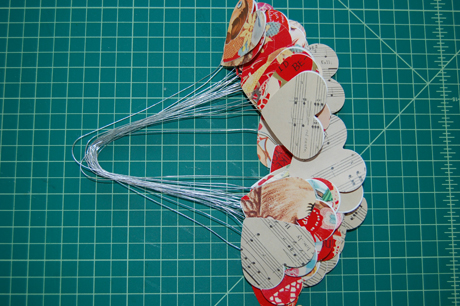
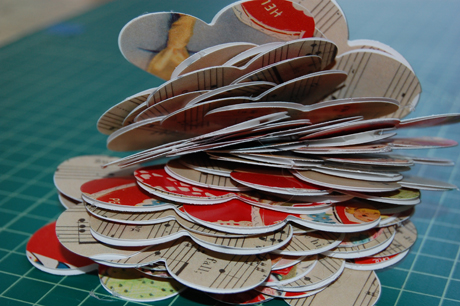
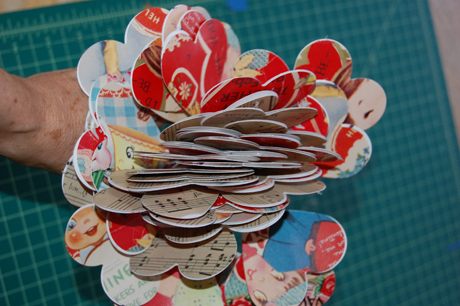
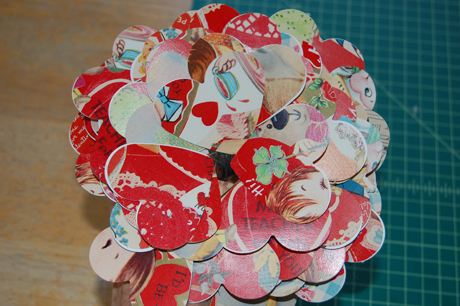
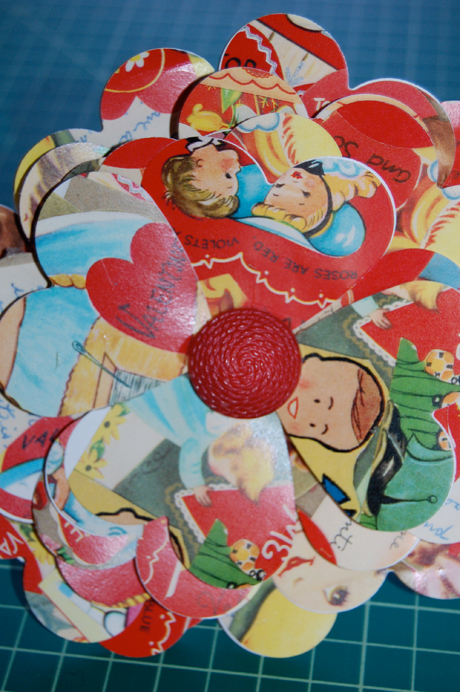
Get ready for a photo tutorial of the Valentines Bouquet you all loved. Get some valentine scrapbook paper, maybe some sheet music, some stripes if you want and you will need 18-20 gauge wire so you can glue both ends with hearts. Cut out 40 hearts and 40 backs to those hearts. Place hearts on either end of 12″ wire stem put scrapbook paper and sheet music back to back and sandwich in the wire. Use a 2″ punch for best results! See supplies below, very easy project.
Picking up where we left off..
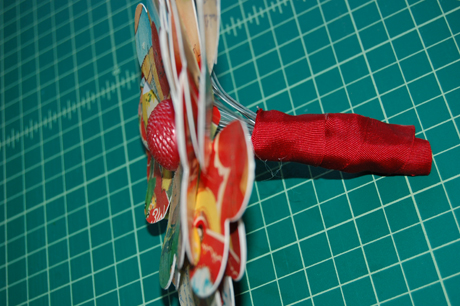
Okay so you have your hearts on wires now so fold the bunch in half, close hand around gently..bend back the hearts and flip the music sheet to the back or whatever you like the sheet music can be on top( they are on wire so whatever you choose will be on the top…press them outward (that’s why we use wire 20 gauge) then when they are all out hold with a rather firm grip and spread them to make a bouquet, so they progressively go out. , wrap ribbon around the wire once you have determined your bouquet is where you like it..use hot glue and wrap ribbon around the stem to the top..seal with hot glue..then in the middle of the bouquet put hot glue and add a button or some other vintage castoff or an old jewel..and voila Give it to the one you love!!!! Please let me know how you did.
Tags: Bouquet, Craft, heart punch, Hearts, Tutorial, Valentines
Categories: Craft, crafting, crafting classes, Craftsy, Decoupage, Easy project, Tutorial, Valentine, Valentine Love, Valentines tutorial, vintage •
2 Comments »
August 15, 2013 by Madeline Rhodes
Try and say that 10 times in a row! Ok, don’t.. because it’s impossible 🙂
Enjoy this free, fun, fabulous tutorial with Jennifer. She will walk you through the process of making your very own bouquet from… vintage tissue paper patterns!
HAVE FUN! If you haven’t yet, visit our brand new TUTORIAL PAGE.. Go Crazy!
Tags: Bouquet, crafts, DIY, DIY bouquet, jennifer paganelli, Sis Boom, tissue paper, tissue paper pattern, Tutorial
Categories: Tutorial •
1 Comment »
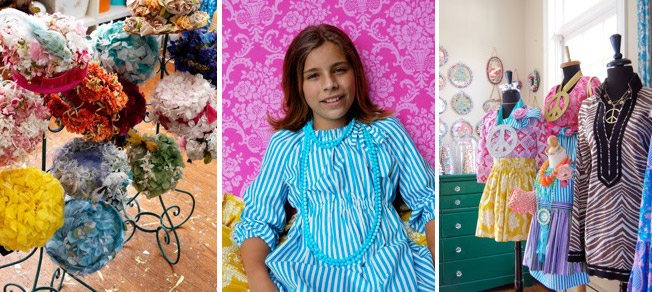
January 11, 2013 by Jennifer Paganelli
Please join us!!! Here in Wilton , Ct.

Tags: Bouquet, Class, Flowers, tutorial. paper
Categories: Banner, Big Events, Books, Girls World, Pink Fabric •
6 Comments »
April 28, 2011 by Madeline Rhodes
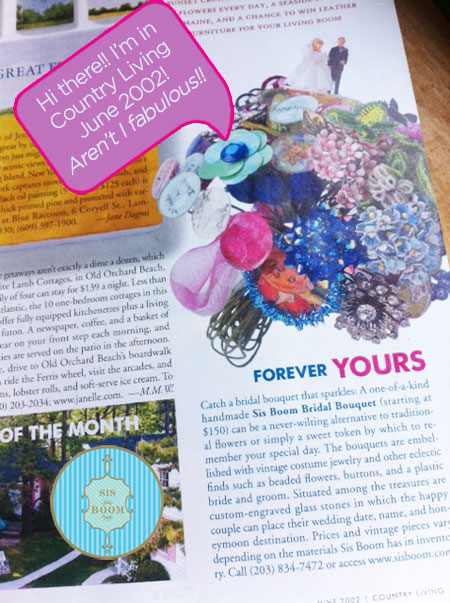
Hey Kate! We have an idea!… How about a Sis Boom Bouquet? Whaddya say? Encrusted with vintage charms, flowers, brooches, and more, this beauty will be sure to make a statement!!!
Jennifer started designing these charm laden show-stoppers wayyyyy back and they’ve remained a staple Sis Boom piece! Peep Jennifer’s bouquet in the June 2002 Country Living!
We wish the Royal couple-to-be a very happy forever!


See more Sis Boom bouquet photos over on our Flickr page!
Tags: Bouquet, Kate Middleton, Marriage bouquet, wedding
Categories: Sis Boom in the world, Uncategorized •
14 Comments »
February 9, 2011 by Madeline Rhodes
Seems like Bouquets are the Sis Boom way to say, I LOVE YOU, this Valentine’s day. There’s something so sweet about presenting a bouquet… like a wrapped up story of love represented by color, texture, and fun! The other important piece in this photo that screams out LOVE?!… The tiny angel & sheep painting by our lovely and amazing friend, Barbara Strawser… how precious?
If you’re into this sweet circle bouquet, this is one you can make at home in just a few minutes (see tutorial below)! Have FUN!
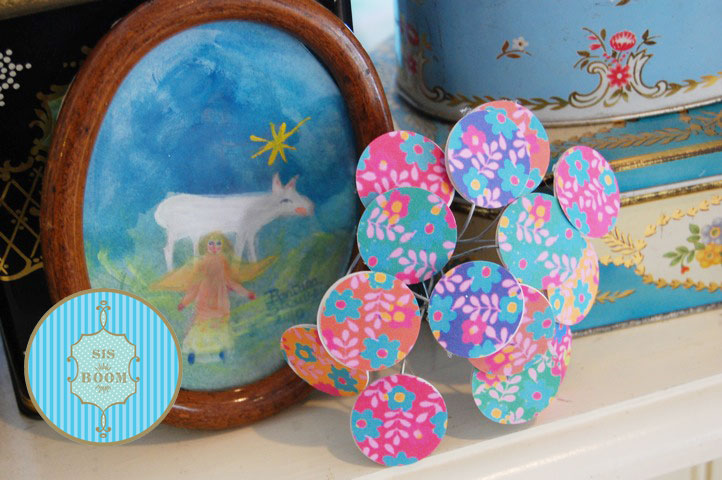
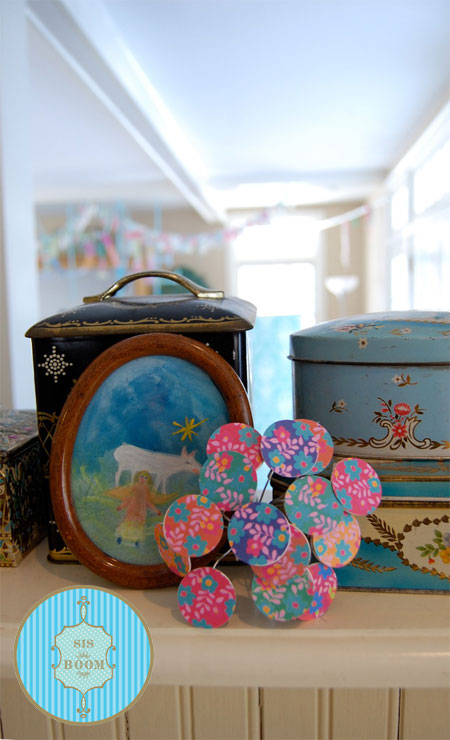
- Download the PDF of circles (by clicking on either image below).
- Print out the circles (we used photo paper to get a nice, glossy finish).
- Cut out the circles (or punch ’em out, if you have one of those handy punches!!).
- Using a thin wire, cut about 12 pieces all the same length (depending on how long you’d like your ‘stems’). Glue your circles back to back, with the piece of wire in between, and then tie all of your wire stems together with a special bow!
- Perfecto!
Tags: angel, Barbara Strawser, Bouquet, sheep, Tutorial
Categories: Love, Tutorial, Valentine •
2 Comments »
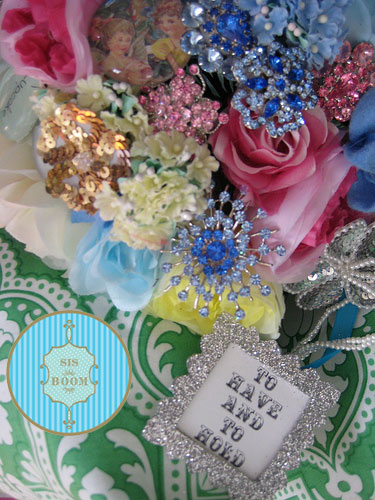
February 7, 2011 by Madeline Rhodes
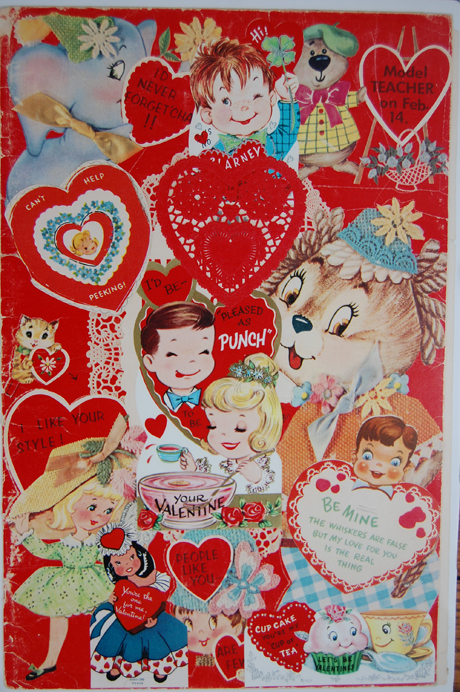
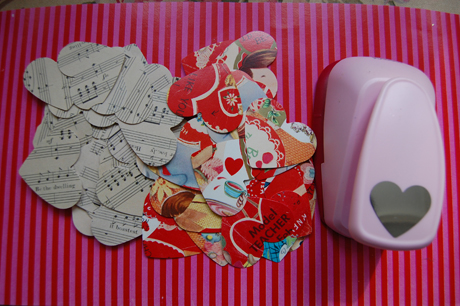
Featured in our Fun, Free, Fabulous newsletter this morning (Don’t get it? Sign up HERE – It will take 2 seconds!), is this awesome, Schoolyard Valentine Bouquet!!!
Made by Jennifer with tons of love, this adorable bouquet says, “I LOVE YOU” the old school way. I’ts super sweet, a tad flirty, and bursting with color!!! See tutorial below & make your very own! Have fun!

- Download the PDF Schoolyard Valentine Collage (simply by clicking on the image above)
- Print out about 4 sheets on a thick card stock
- Use a 2″ heart punch to punch out your heart ‘flowers’
- Glue hearts back to back on wire stem
- Bend the wire to make it look like a bouquet, shape as desired
- Add a filigree as the focal point of your bouquet!! (buttons, pom-poms & marbles are just a few ideas!)
Tags: Bouquet, I love you, Schoolyard Valentine
Categories: February, Love, Studio, Tutorial, Valentine •
17 Comments »
February 3, 2011 by Madeline Rhodes
This one’s for all of YOU out there!!! What better way to say, “I LOVE YOU”, than with a sweet, colorful bouquet?!
By incorporating all happy colors, this one won’t have to be tucked away with the rest of your pink and red decorations after February 14th. It’s the perfect color palette to welcome spring… and the perfect color palette to put a smile on your face each day you pass by it.
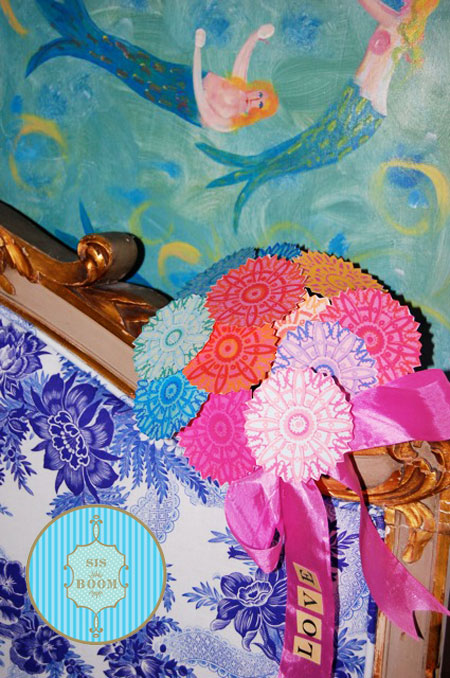
To Make your own:
- Download the PDF, simply by clicking on the image above
- Print & Cut out your “flowers”
- With a hot glue gun, use pipe cleaners, wire from hangers, or any other like object, and secure the back of the paper “flower” to a flattened piece of the pipe cleaner or wire
- Repeat until you have your desired number of flowers
- Tie them all up in a beautiful bow with a happy ribbon
- Use letter stickers, if you have them around, to spell something special out in the ribbon!
- Viola!
Tags: Bouquet, Flowers, Tutorial, Valentine
Categories: Love, Studio, Tutorial, Valentine •
7 Comments »