The Quilt Show has it goin’ on! Starting on Friday…

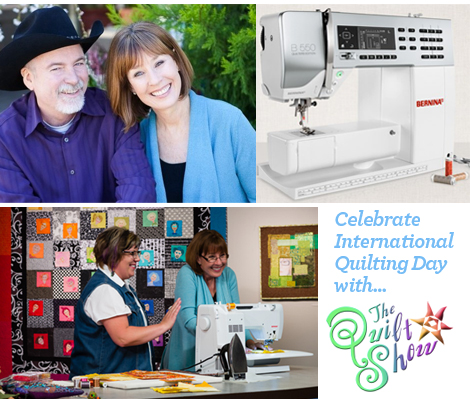
International Quilting Day is just around the corner on Saturday, March 16, and Alex Anderson and Ricky Tims, hosts of The Quilt Show, want quilters, sewers and crafters to help us celebrate International Quilting Day by seeing what’s going on in today’s quilting world.  They are opening up free access to over 140 of their shows from their www.thequiltshow.com website beginning Friday, March 15, through Sunday, March 17, and there will be terrific prizes from companies we know and love like Bernina, GAmmill, Superior Threads, AccuQuilt, C&T Publishing, RJR Fabric.  Ricky and Alex will have gift baskets to give away too.  The grand prize is a new Bernina 550QE sewing machine!

All you have to do is go to the website on Friday, March 15, and there will be a place to click and sign up as a free member, register for the prize give aways, and have fun cruising around the website.  You’ll want to wish for rain so you can stay home in your pajamas and immerse yourself in show after show.  There will be all kinds of quilt-related things going on at The Quilt Show all weekend long so stop by the website several times over the three days.  Help Ricky and Alex in their celebration of quilters around the world and all things quilted!

Hickity Pickity Sun hats

Sand, shovels, pails, sunscreen, flip-flops, and lemonade… what’s missing?! A SUN HAT!!!

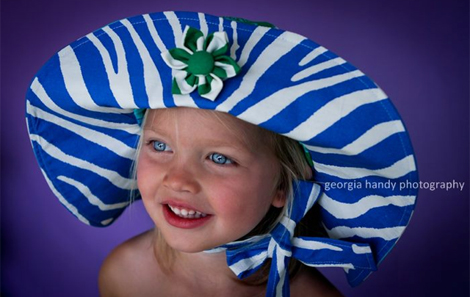
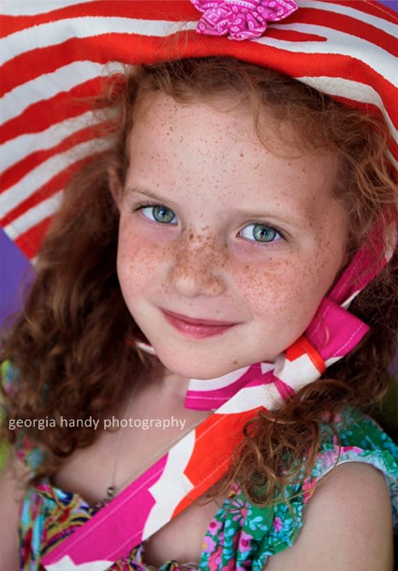
We know where you can get one of those.. Judy Buchanin has a beautiful Hickity Pickity shop on Etsy. It is overflowing with all sorts of beautiful eye candy — you’ve gotta check it out! It’s not in the Etsy shop currently, but our fave piece of the day is this stunning sun hat that we spotted on her facebook page! Maybe she’ll do a custom order if you’re feeling like this will complete your summer look!

Beautiful photos by Georgia Hand photography

Lyn Harris creates a Stunning Circa Quilt

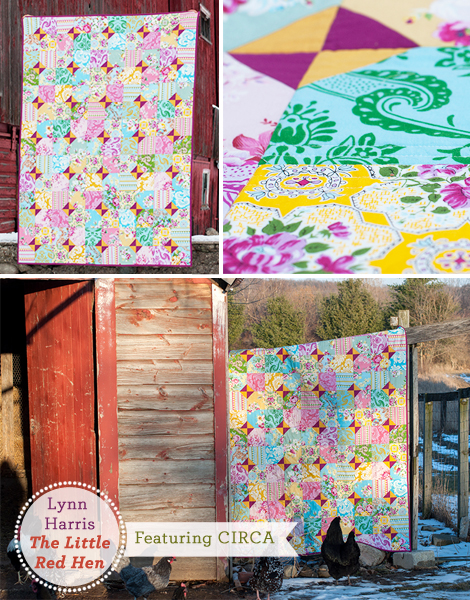
Want to see something so incredibly beautiful?! Lay your eyes on this magnificent Circa quilt created by our friend Lynn Harris, over at The Little Red Hen.

Circa is so soft to the eyes, so graceful, peaceful, and so perfectly saturated just where it needs to be. Our Circa feedback has been incredible- we can’t wait to see what all of you talented lovelies pull off with this exciting line. Have an awesome day!


LOVE COLORFUL + SIS BOOM CLIP ART SERIES: SEQUIN FLOWER TREE

Without further ado, I hand the Sis Boom glittery mic over to Jessica of LOVE COLORFUL for our weekly Sis Boom CLIP ART par-tay!

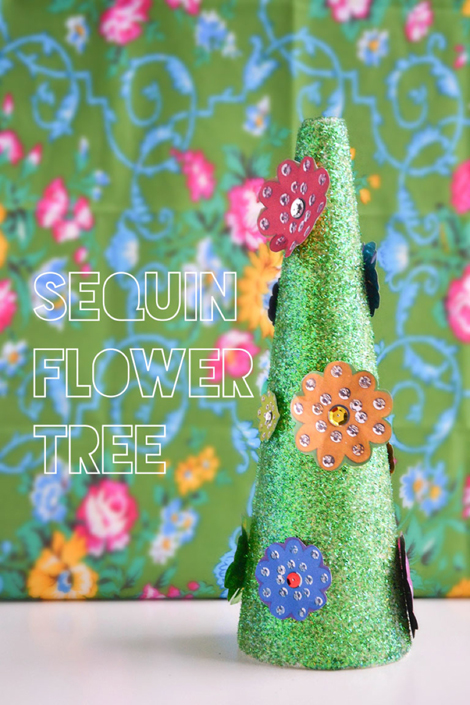
Looking for an festive DIY decoration that’s perfect for Spring and easy to make?  I’ve got the perfect project for this week’s Sis Boom Clip Art Series project: a sequin flower tree!

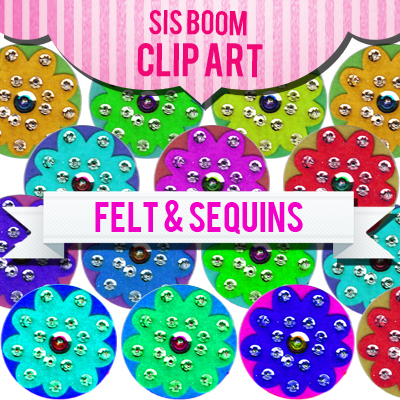
This project features the Sis Boom Felt Sequin Flowers clip art!

They’re so colorful and fun and will give you the look of real hand-sewn felt flowers (without all the time consuming work of actually sewing on each sequin!)

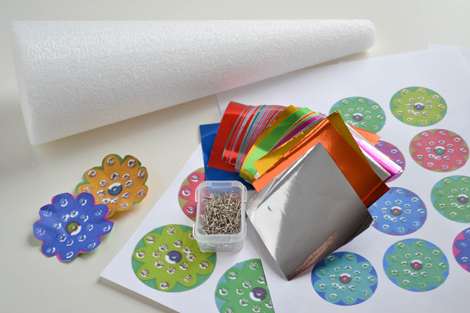
For this project you will need:

Sis Boom Hand-Sewn Felt Flowers & Sequins clip art file

-a styrofoam cone

-green tinsel glitter

-metallic origami paper

-8 1/2″ x 11″ sticker paper that can be used in an inkjet printer (I found mine at a local office supply store)

-sequin pins & a couple of sequins

-glue, scissors

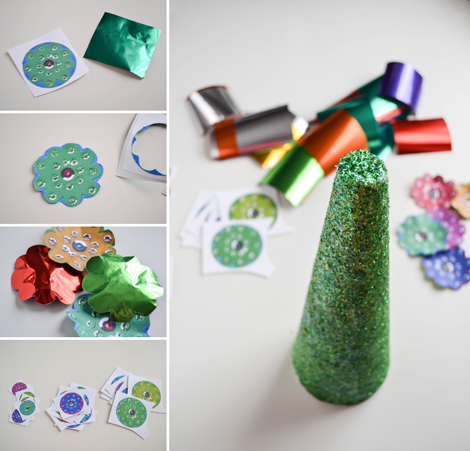
To start, cover the styrofoam cone with glue and sprinkle on glitter. Shake off excess and let dry. (You can also spray with an acrylic sealer if you want to make sure the glitter stays!)

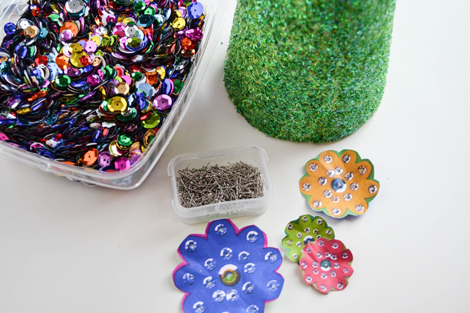
Print the clip art file on the sticker paper. You can also scale down the image to make a variety of flower sizes – just remember to save a copy of the file and then scale the image to 75%, 50%, etc.  Cut the flowers out into individual pieces – this part doesn’t have to be super clean as you will cut out the actual shape of the flower in a moment. Peel off the backing and stick a flower to the backside of a piece of origami paper (sticky side of flower to white side of origami paper) so that the backside of the flower becomes shiny. Cut out the flowers again, this time cutting around the petals. “Crinkle” each flower by bending up the edges to give it some dimension.

*If you can’t find sticker paper, you can still achieve the same effect by gluing each flower to the origami paper, but you’ll have to wait some extra time while each one dries.  The sticker paper just makes it super quick and easy!

Using the sequin pins, pin each flower to the styrofoam tree, placing a real sequin in the middle to give it a little extra shine.

Pop over to LOVE COLORFUL to see the beautiful finished product. You’ll love it– Promise!

LUSH

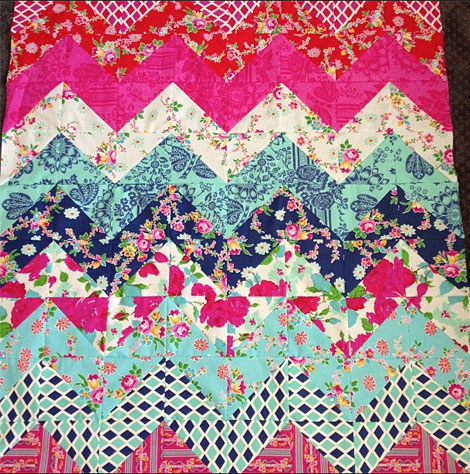
We all love a chevron that is for sure and a Chevron quilt is up there with my all time favorite things. Jamie Harned is a very long time friend who has taken center stage here many times and we just love her.  She’s one of the happiest souls on the planet and shares her stash and talents with others.  Jamie created this Happy Land beauty and the other beautiful soul Melissa Averinos will be quilting it for her.  Melissa is an amazing artist, textile designer, and quilter all wrapped into one.  This is going to be incredible when it’s all done but I just had to share.  Great job Jamie !!


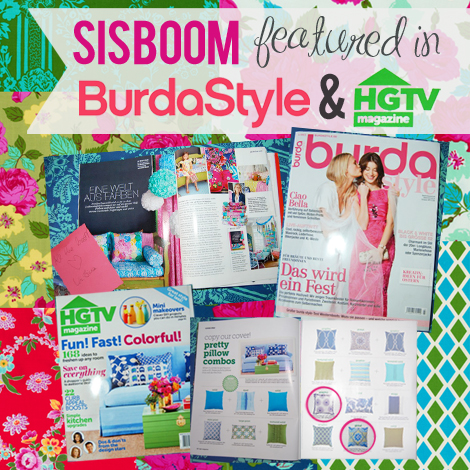
Sis Boom featured in burda style Mag & HGTV Mag!

Excited to share these two wonderful features with our Sis Boom friends!…

We spotted TWO of our pillows in a recent HGTV Magazine feature: Pretty Pillow Combos

(Like what you see? Visit online shop, Moxii, to pick up these Pretty Pillows for your home! click Here and Here)

Our spread in Burda style may be in another language, but we’re loving the way it looks! If anyone can read it, let us know what it says 😉

Thank you to the Burda Style team, especially Kristina, for helping spread the Sis Boom magic around the world!


BFF’s in Happy Land

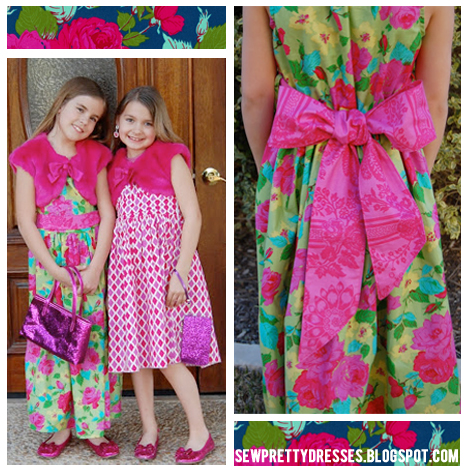
Thanks to our friend Jenny over at Sew Pretty Dresses, we get to admire these sweet BFFs wearing some fabulous Sis Boom Dresses in Happy Land! We’ve got one sweet girl in a Marissa dress, and our other sweet girl donning the Mary’s Fancy Sash dress from Girl’s World! Jenny– you never cease to amaze!

Have a wonderful day everyone!

That’s a big deal!

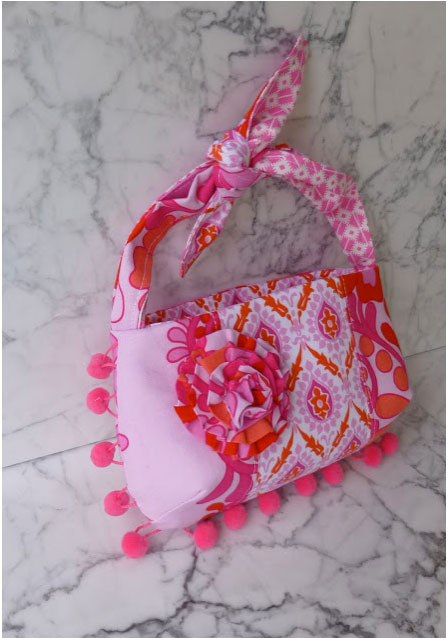
We are loving Suzanna McKeon’s work her sweet handbags are just the perfect accessory!  But what we love more than anything are the successes you all have!!  She facebooked us to tell us that her bags will be selling in a museum shop!!! Not any museum shop the Esse Purse Museum in Little Rock, Arkansas!  We are so happy that they will be carrying her wonderful Girls bags!!  Check out her Etsy shop and be amazed.  Congrats lovely lady!!!  So happy for you!!

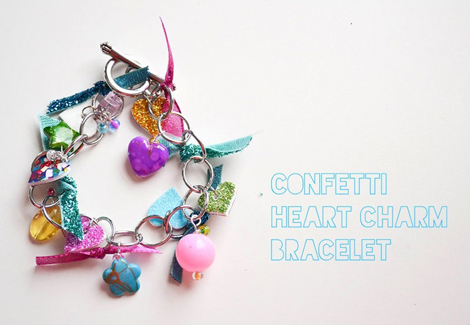
LOVE COLORFUL + SIS BOOM CLIP ART SERIES: CONFETTI HEARTS CHARM BRACELETS

Hi Friends! We’re officially ahnding the mic over to our girl over at LOVE COLORFUL.. JESSICA!
For the FULL post, go to Jessica’s beautiful site, LOVE COLORFUL.

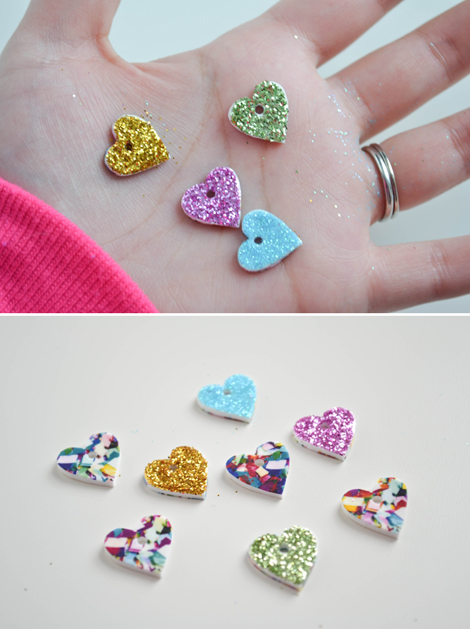
Welcome to the very first Sis Boom Clip Art Series post! I’m all sorts of excited to share with you some super cute charm bracelets made with Sis Boom’s Confetti Hearts clip art!!

will need the following:

Sis Boom Confetti Hearts clip art file ($5.00)

-Shrinky Dinks Inkjet Paper (make sure you get the kind of Shrinky Dinks that specifically say they can be used in an inkjet printer!)
-paper hole punch
-glitter
-glue
-charm bracelet chain
-7 mm jump rings
-an assortment of jewelry beads, findings, and ribbon

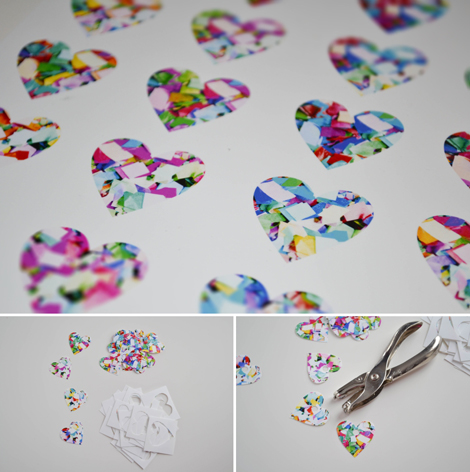
printing out the confetti hearts on a piece of the Shrinky Dink paper.

**As per the Shrinky Dink instructions, be sure to brighten your image before printing – when you bake the pieces the color becomes darker.  I opened the confetti hearts file in Photoshop, went to Image > Adjustments > Brightness/Contrast and set the brightness to 100 and the contrast at 30.  (You can play around with these numbers to get slightly different color effects). You can achieve the same effect in most photo editing programs, so as long as you have something to open the .png file in,  you should be able to find a brightness option.

Once printed, cut out the hearts and use a paper punch to punch a hole in the top of each heart.

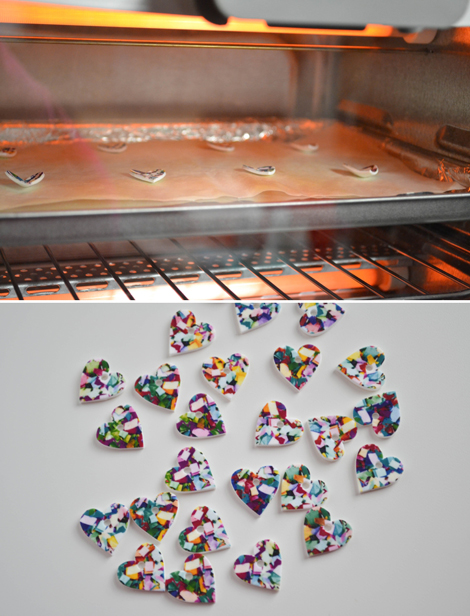
Bake in a toaster oven according the the Shrinky Dink instructions. It’s so much fun to watch the magic that happens in a very short period of time!

To jazz up the back side of each heart, I simply dabbed a little glue, sprinkled some glitter, and voila! Now they have confetti AND are sparkly! (You can seal with a little Modge Podge to make sure the glitter stays put!) You can also just leave the backs white, or even paint them a solid color depending on the look you’re going for.

To peep the final (and most exciting) steps of this tutorial on LOVE COLORFUL, click HERE! Jessica will walk you through the process of turning these beauties into bracelets!

Jessica- thank you for being such a ROCK STAR! We can’t wait to see what you post next Friday!