Back to School Look with Baby Hobbes Designs

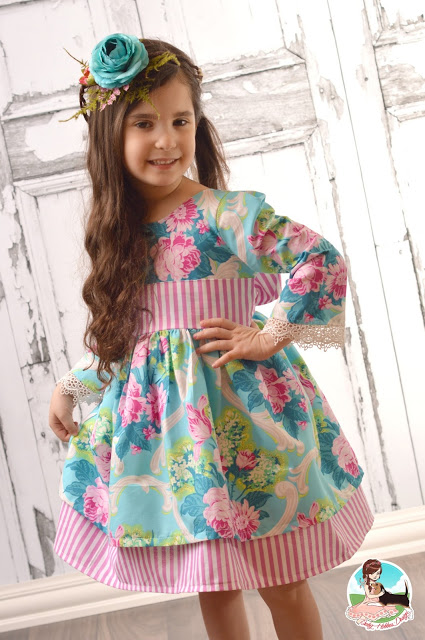
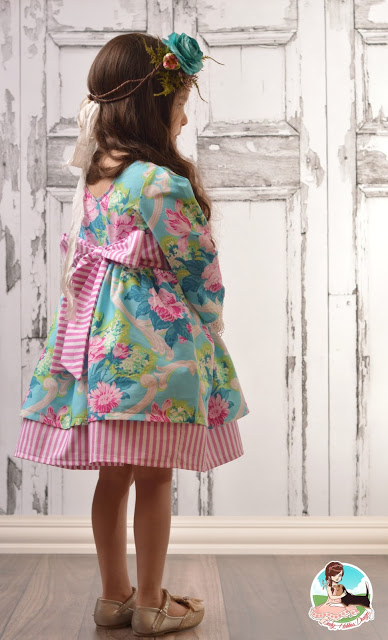
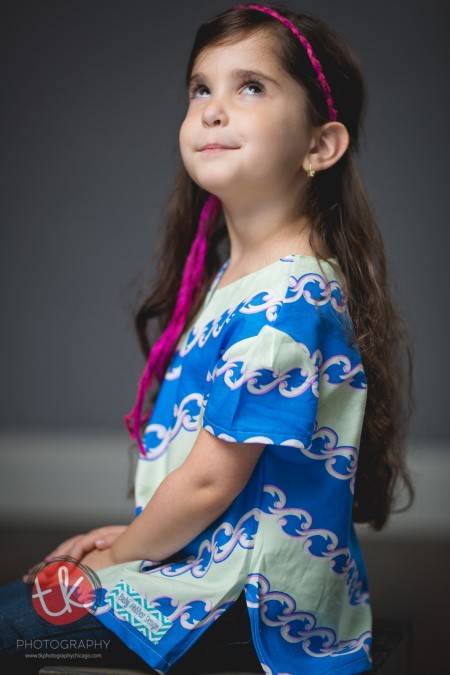
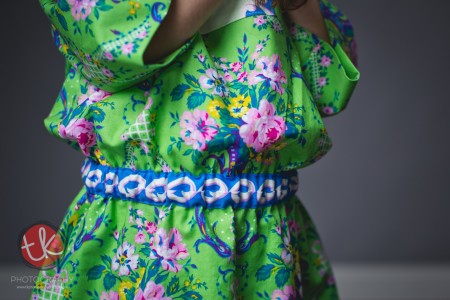
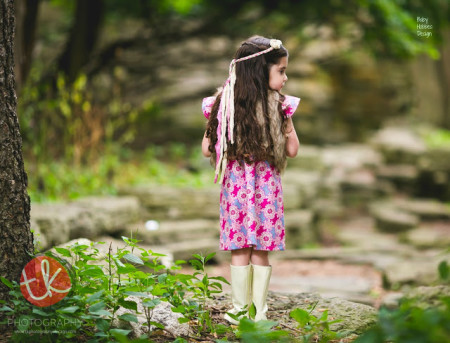
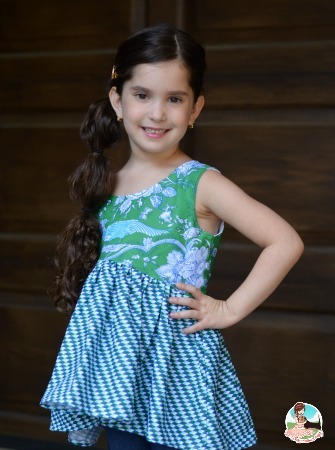
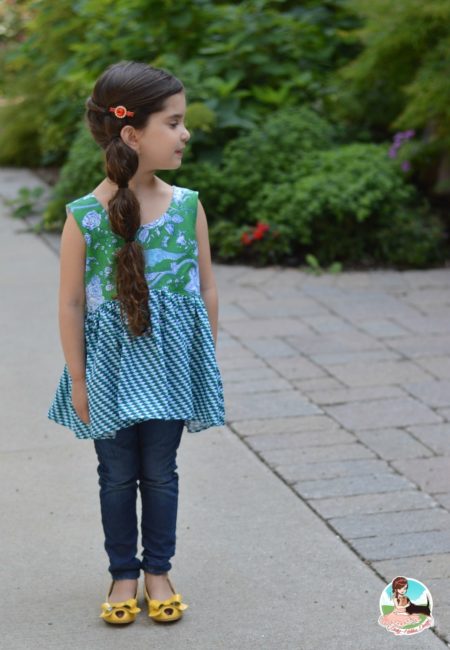
Merav, of Baby Hobbes Design, is back and does a stunning version of the Mary Fancy Sash Dress. The fabric used for this project is Sophia and Terrie, both in Green from the Hotel Frederiksted collection due out in November. Girl’s World patterns are only available as paper patterns in the back of the book, so make sure you grab yourself a copy off Amazon. It’s filled with 21 amazing projects for girls of all ages. We are so thankful for Merav and her beautiful creations in Sis Boom fabric. Make sure to follow her on Instagram and Facebook for more inspiration.

Mary Fancy 2

Hello again! I am so excited to take over Sis Boom today, and to share one my favorite Back 2 School (B2S) looks. Before I go any further, let me wipe away my tears thinking about Hobbes starting 1st Grade soon. When did this happen? All summer long we’ve been excited for this advancement, and now, I am heavyhearted over this huge milestone.

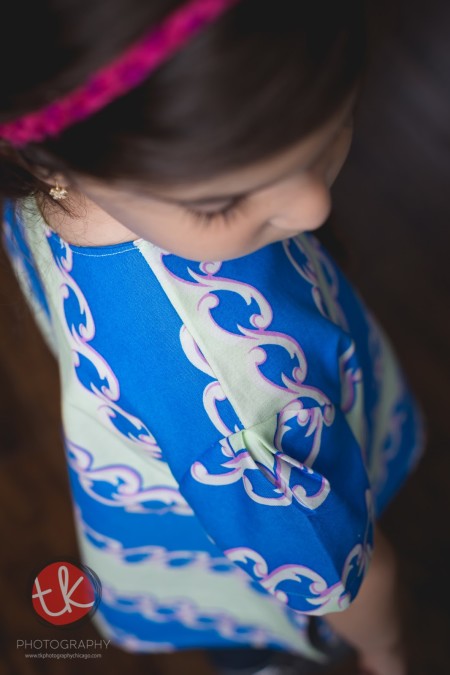
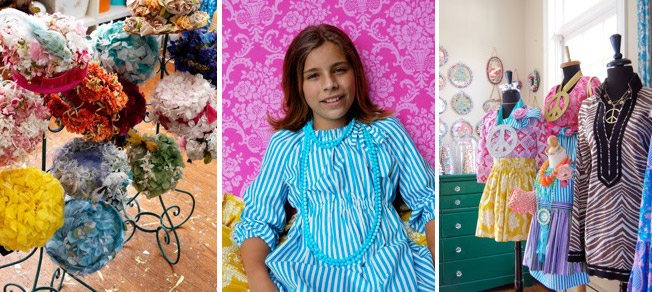
I am, however, fired-up about all the new B2S looks I am sewing lately. Especially previewing Sis Boom’s new collection Hotel Frederisksted. The pop of colors on this 18-fabric collection is mind-blowing. From soft reds with the hint of pink, to sapphire blue, and of course this gorgeous emerald green. This collection is FIERCE! Especially paired with Sis Boom pattern collections.

Mary fancy 5

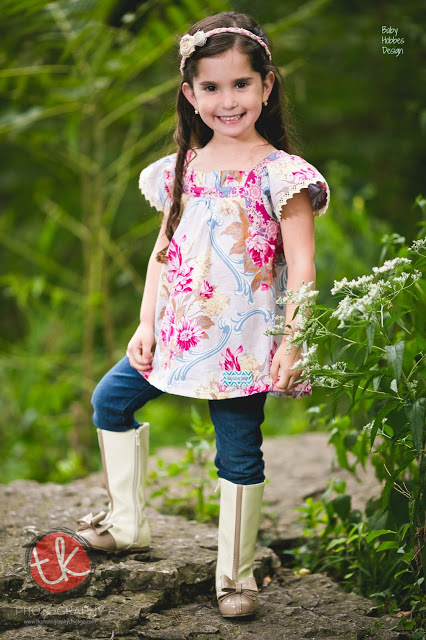
One of my goals for B2S sewing with Hobbes is to sew separates. I want to give her the flexibility to mix her handmade collection with ready-to-wear jeans and tees from our local shops. Because each Sis Boom pattern is filled with details to achieve the perfect individual fit, I start with my finished look measurements and work backwards, modifying the garment for my ideal look. This time, reaching to my favorite printed pattern books: Girls World

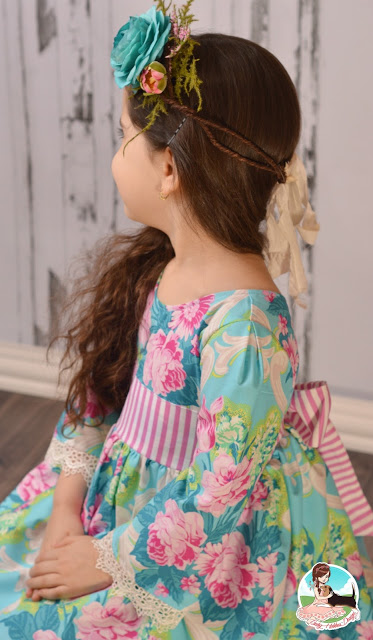
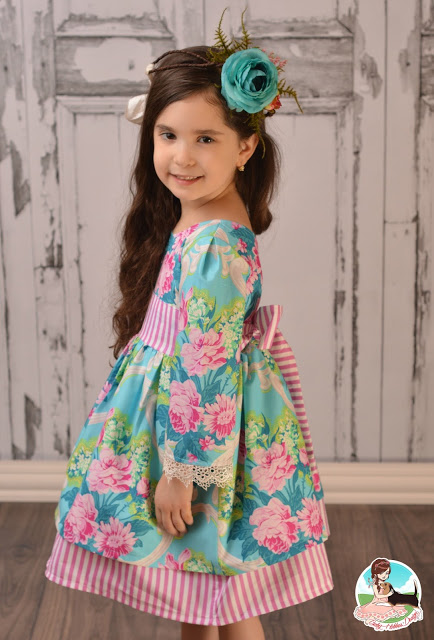
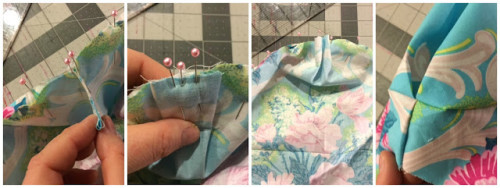
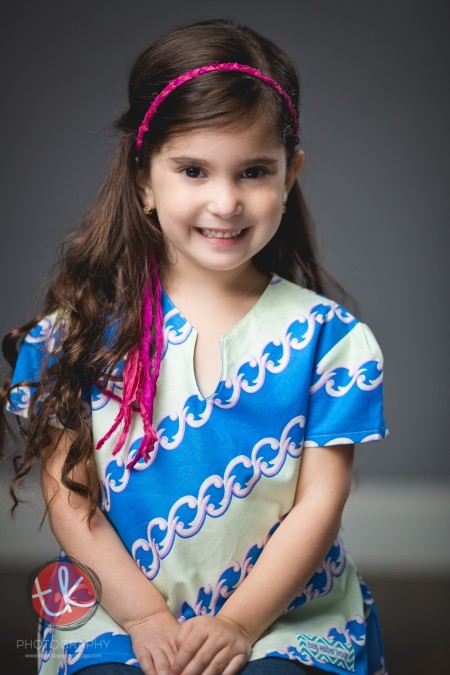
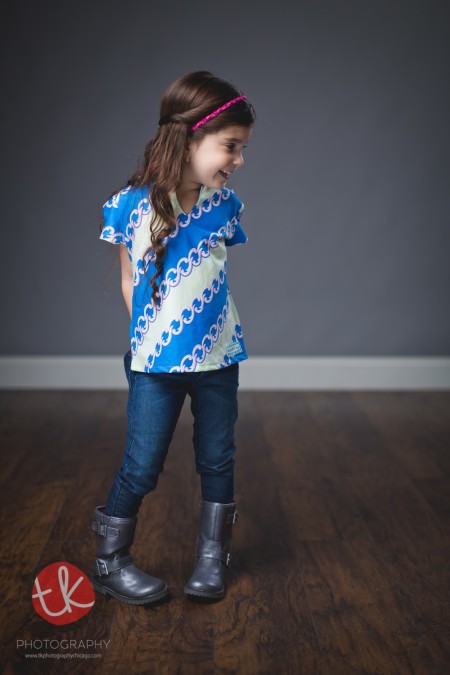
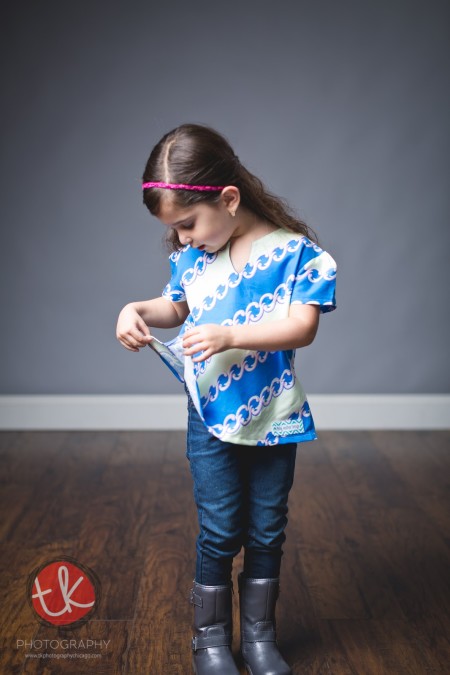
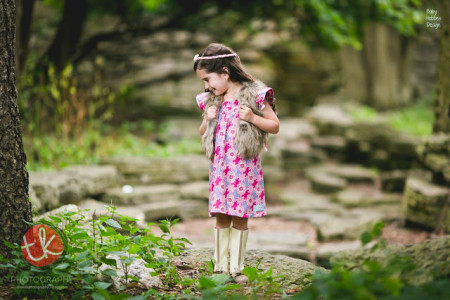
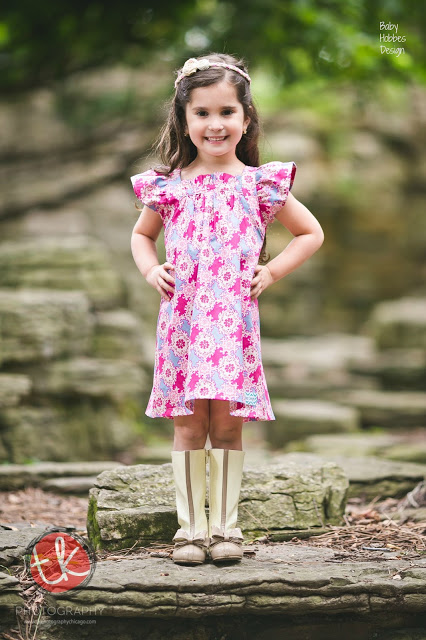
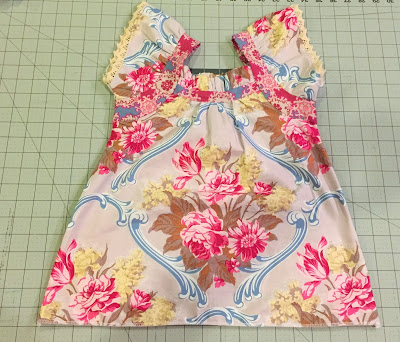
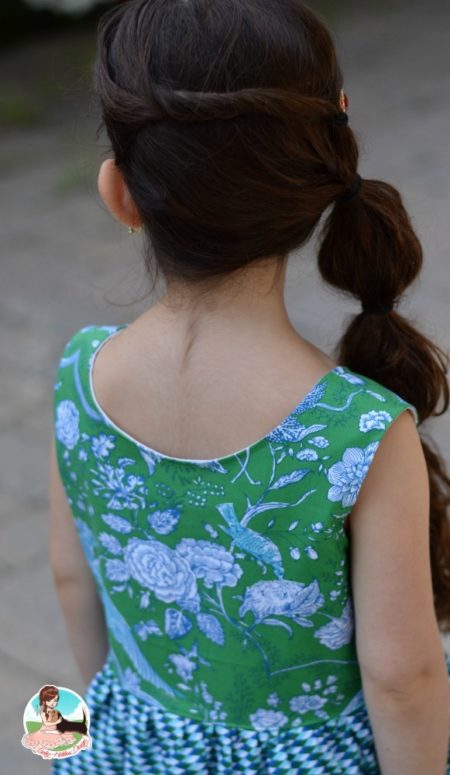
I chose to work with the awesome Mary Fancy Sash Dress Pattern from Girls World, because I love the ease of the pullover dress. No zippers and no buttons means this mommy can finish her coffee in the morning while Hobbes dresses herself. I made 3 easy tweaks to the pattern. The most obvious one is that I left out the sash and turned it into tunic length. The second change was that I lined it. It doesn’t need lining at all, because the pattern calls for bias trim to finish all the edges. I have to come forward and express that bias bonding and I don’t always get along. Honestly, to save on topstitching time I just cut a lining piece of both the front and back and zipped it through my serger as you would with any other tank style lined dress.

Mary fancy 3

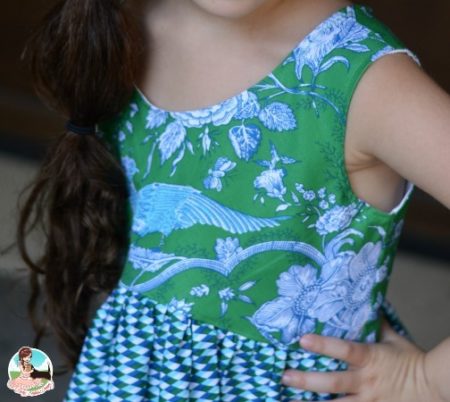
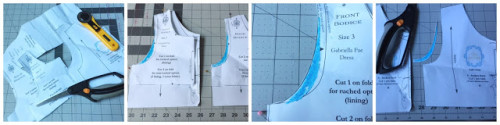
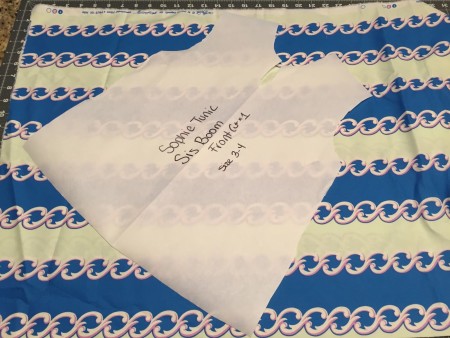
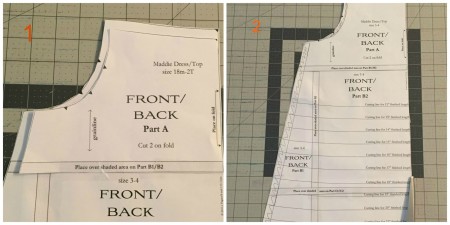
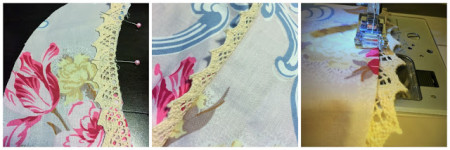
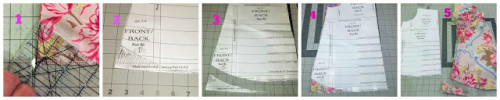
The biggest transformation to the pattern was how I cut the front bodice piece (top and lining) on a curve. I love the look and volume that a curve bodice gives to our tops and dresses, that I decided this Fall, Baby Hobbes Design’s collection needs to be cut on a curve. To achieve this look, I took the front bodice pattern-locating the side with the word fold and starting from the bottom, I measured 1.5 inch up. I marked it. Then I located the opposite edge of the side of the bodice under the arm curve. From there I drew a line on a curve, meeting at the 1.5 mark that I made on the other side, and voila, you’ve curved your bodice.

Mary fancy 4

* To see the tutorial on how I did this, stay tuned for my next Sis Boom guest blog post – I’ll share more of this technique.

Till then, Happy Sewing!

Merav from Baby Hobbes Design

Guest Blogger: Baby Hobbes Design and the NEW Sally Dress Part II

Merav of Baby Hobbes Design is back with Part II of her take on the new Sally dress, this time with long sleeves. Sally is the perfect year round dress and super simple for the beginner sewist. We hope you give her a try and don’t forgot to share your creations with us on Facebook and Instagram!

Sally Part II, Long Sleeves for the Win

I am so happy to be back with part II of the Sally Dress tour, and this time I am here to share with you an easy trick for a year-round dress. I am always in the market for new and easy beginner patterns-and, as we discussed in last week’s post, Sally is just that! But how about Sally with sleeves?

Sally part2a

I adore the tank style, pull-over Sally dress! Here in the Windy City, we are still in LONG sleeves for a few more months. And a versatile pattern means ‘A Win’ for me-to sew year round.

sallpart 2b

This week I let Hobbes play around with my beautiful Sis Boom fabric collection, and I was in heaven when she pulled out Caravelle Arcade’s Jessica in Blue and Beauty Queen’s Katie stripe in Pink. My head (and heart) went straight into Valentines mode, and we decided this will be her dress for our big Valentines fundraiser next month.

You are going to love how easy it is to take Sally and change her up to meet the demand of the weather. To achieve this look, you will need the Gabriella Fae pattern for its bodice and sleeves. Also, if you are a sucker for lace like me, check out my November Blog here for adding these pretty darling details.

sallypart2c

Once you have both the Sally and Gabriella Fae bodice pieces cut out to size, go ahead and follow the steps here in order to change the arm cycle of Sally to adjust for the sleeves.

sally part2d

Looking at the pictures above, from left to right. First, cut your pattern size in both dress bodice to size. Next, lay the Gabriella Fae front bodice on top of the Sally front bodice. Match the shoulders at the arm cycle edge. For this quick transformation, I am not changing anything else in the pattern–just the curve of the arm. As you can see, I shaded/colored in the difference in arm curve directly on the Sally for easy cutting. Once you have your markings on the front (repeat with the back bodice), go ahead and cut off the markings so your Sally can accept Gabriella Fae sleeves.
***Please note that you can do this trick with most of your patterns. Always remember to change the arm-cycles and note the difference in the shoulder alignment.

Next, sew your sleeves. You may choose to follow the Gabriella Fae directions to add your sleeves. Because I have experience sewing that pattern, I decided to change it up a bit and add a pleat at the top shoulder instead of a gathered puff. I’ll be honest, it was an experiment, but I had nothing to lose–it’s all in the pinning.

sally part2e

It’s so easy to add this small detail. First, fold your sleeve in half and stick a pin in the top middle. Then, starting from the edge, pin your sleeve to the bodice until you are at the halfway point/reached your shoulder seam on the bodice. Then move to the other side of the sleeve, starting from that end, pinning till you reach the middle of the bodice.

Looking at the pictures above, from left to right: grab your excess sleeve material in the center (bout 3-3,5 inches) and make sure that the sleeve is pinned perfectly up to the shoulder seams. Next, you will want to flatten the access sleeve and perfectly align it with the center seam on the shoulder. Pin in down and check it on both sides to make sure the pleat center is aligned with shoulder seam. Once you are happy, sew it up to the bodice.

Once you have added on your sleeve, continue with the Sally directions. Just remember when you are sewing your front and back bodice closed, you are starting at the sleeves and sewing down.

sally part2f

sally part2g

And that’s how I got Hobbes this new Sally. It’s an easy beginner, pullover darling dress pattern.Now show me how you transform your Sally dress. Get your copy of Sally and Gabriella Fae here.

Special thanks to my talented friend Julie over at the Little Sparrow Bows for her perfectly made to match hair halo.

Like my backdrop? Temperatures have been in the teens here and I just didn’t have the heart to ask Hobbes to pose outside. Loving my new Big Time Prints (formally Bubblegum Backdrops) for a quick and warm photo-shoot.

Till next time, happy sewing!
~Merav @ Baby Hobbes Design

Guest Blogger – Baby Hobbes Design

Chicago blogger and seamstress extraordinaire, Merav of Baby Hobbes Design, is back for second review our patterns and fabric. Merav is a self-taught seamstress and has her darling daughter, nicknamed Hobbes, modeling the Sophie Tunic in this guest post. We love how she used the Abby fabric for the Carvelle Arcade line on the bias.

A Perfect Pattern For An Indecisive Month: Sis Boom Sophie Tunic Part I

BH1

October has always been a difficult sewing month for me. I am not ready to commit to styling Hobbes with the long sleeve warmth of Winter, we have quite enough snow-covered months ahead of us; but the summer heat and the spaghetti strap dresses are now behind me. After receiving another beautiful mix of Sis Boom prints that included Caravelle Arcade Abby in Blue and Daisy in Green, I decided to capture October indecisiveness with a new to me pattern that allows me to change my mind too. Well in lengths that is!

Sis Boom’s Sophie Tunic offers four different sleeves styles that include short and long, cuffed and a cap sleeve too. It also outlines a few different hem lines so you can shorten your top, or create a tunic length over leggings top. You can even get creative with your keyhole, with options for contrasting fabric overlay and different keyhole closures.

BH4

For my first Sophie look, I made Hobbes a simple tunic. I wanted to sew it in the patterns’ purest form to highlight an incredible aspect of design manipulation we may often forget about: Cutting pattern pieces on ON THE BIAS:

BH5

You have to be very careful when you are cutting on the bias, or your garment may move or even stretch in the wrong direction. With the Sophie pattern, I was careful to cut it diagonally along the grain, however, because the pattern design includes flaps on the bottom ends of the tunic, I knew that my fabric wouldn’t pull.

BH6

Before I cut however, I decided to redraw the pattern piece on wax paper so I would have the finished outline of the top. I did this truly to make fabric placement easier, as I wanted my keyhole to lay perfectly on the cream section of my Abby in Blue Fabric.

BH7
BH8

One of my favorite features on this top is the pleat on the sleeve. Just one little inverted pleat and the tunic has a soft and airy feel to it. I choose to sew my tunic with the cap sleeve, imagining it would look sweet over a long sleeved knit top or layered perfectly under Hobbes collection of faux fur vest.

BH9

I really enjoyed the simplicity of this pattern and already have mountains of ideas for my next few. It really is a great pattern to showcase a very bold print. And the versatility is endless. Join me Friday, for Sophie Tunic Part II, a different spin on Sophie.

Here is a sneak:

BH10

I would love to hear your thoughts and comments, come say hi to me over Baby Hobbes Design
You can also follow me on Instagram @Babyhobbesdesign
Special thanks to the amazing duo Thomas and Tiana over at Tk photography
Beautiful hair pretties by the talented Julie at Little Sparrow Boutique

Guest Blogger – Merav Ruthman of Baby Hobbes Designs

We are thrilled to have Chicago blogger and seamstress extraordinaire, Merav of Baby Hobbes Design, reviewing our patterns and blogging about them. Merav is a self-taught seamstress and has her darling daughter, nicknamed Hobbes, modeling the Maddie pattern in swing top and dress versions in this guest post. We LOVE her lace embellishments and swing curve bottom on the top and hope this post helps you push your creativity to the limit! Please follow her Baby Hobbes Design blog, and on Facebook and Instagram.

Sis Boom Maddie and the Fall

hobbes1

It is by no surprise that I ADORE sewing designer fabrics with beautiful flower scenes, and if you have been following my Facebook posts at Baby Hobbes Design, you probably know by now that I have a little ‘obsession’ with Jennifer Paganelli and her Sis Boom prints. Well, you could have imagined my excitement when I received a package from her with two gorgeous Caravelle Arcade floral prints, one very new to me pattern, and the challenge to “create something wonderful.”

I am in heaven!

It was perfect timing for this collaboration too, as I just started sewing Hobbes back to school looks and the weather decided to turn from beach-bound 90 degrees to a cool and breezy 60 degrees here in Chicago. I downloaded the Maddie pattern (find it here) and instantly knew that I wanted to play with the idea of wearing your summer wardrobe right into Fall. Maddie, with her delicate shoulder curves and angelic flutters seemed like the perfect top/dress to slip over a long sleeve tee or under a faux-fur vest.

hobbes2

hobbes3

What I love about the Sis Boom patterns, aside from how gorgeous and timeless they are, is that I always learn a new sewing technique (hum, did you see the sleeve bands). When I first started sewing Sis Boom patterns as a beginner seamstress, I appreciated that the designers take their time to teach and give you the opportunity to adapt the design and measurements for the best fit and style. My Hobbes is petite and I appreciate the opportunity to alter sizing without compromising the finished product.

It’s so important to measure the child wearing this pattern. Hobbes measured in between two sizes, so I cut both bodices and laid the smaller one above, then traced over the larger bodice, keeping the bodice length at size 3-4 but the width with size 2T (see the shaded area on picture #2) then I cut it for her size. I sewed and finished the dress per pattern directions.

PicMonkey Collage

There is something so classic about a repetitive print dress. Caravelle Arcade, Ruby in pink is perfect fabric design to work as a coordinate (see my next look); but she can certainly be sewn alone-to give Hobbes’s Maddie Dress the perfect vintage look.

hobbes4

Lastly, I waned to pair the dress with Miss 5’s favorite boots, so I decided to hem the dress at the midpoint of her knees. My Maddie dress is complete!

hobbes6

The second look I created with my luscious Caravelle Arcade in Jessica was a tunic top. I just cherish this print, with its soft pinks and vintage blues on a creamy, buttery color back-ground. Even though it has such a large floral print, the fabric lends itself for wear-ability no matter which direction you are working with.

I decided to go for a top since Hobbes, who has been wearing a dress almost every day since I started sewing, discovered that it’s easier to climb the monkey bars in pants and a shirt. My jaw dropped when she asked me for jeans for back to school, and I couldn’t wait to create this look for her. This time around, I decided to add some subtle touches to the Maddie Top. Starting with an ivory lace trim sewn in to the flutters.

hobbes7 hobbes8

To get this look, you have to cut FOUR flutters (2-main fabric, 2-lining) to create lined flutters. Then cut two pieces of lace trim about ONE inch longer then the length of the flutter piece. Remember to use the measurements of the side of the flutter that doesn’t meet the sleeve band.
***I chose not to include the interfacing in the flutters

Starting from the left, in the pictures below:
1) Place the lace, right side together with your flutter piece.
2) Place your flutter lining (I used the same fabric) right side together with your flutter, sandwiching the lace.
3) Pin and sew in place
4) As seen in the middle picture, open up the flutter and iron the seams. Be careful ironing the lace, depending on its material may melt.
5) Top stitch your flutters/lace in place.

PicMonkey Collage 3

Lastly, I am loving tops with a little give this season; especially since I plan to layer it. I decided to add a little swing curve to the sides of the Maddie top.

hobbes9

To achieve this look, I sewed my top, according to direction, skipping the hemming step and sewing up the side and flutter sleeves. I laid my shirt flat on my measuring board. Since I don’t have a french curve ruler, I played a bit to figure out the curve length for this top. I decided to measure an inch and a half on each side (measured from the bottom side corner) and mark my original pattern with it.

hobbes10

Following the order of the pictures, you can see that I created a curve on the bottom of my pattern, starting at the 1 1/2 inch mark (see shading). I then cut it off from my pattern piece, placed pattern over my shirt folded in half vertically and cut into my Maddie top.

PicMonkey Collage 2

Lastly I hemmed the shirt, following the directions in the pattern: folding twice and sewing 1/8 from the folded edge. My Maddie Swing Top is All DONE!!!

hobbes11

And look how flowy it looks paired with a long sleeve top. Its exactly as I imagined it!

hobbes12

If you adore this pattern and fabric like I do, please visit Sis Boom for so much more inspiration. To get Hobbes look, you can visit me at Baby Hobbes Design – please stop by and say hi! Made to match Halo created by the talented Julie over at The Little Sparrow Boutique. Special thanks to Thomas at TKPhotography for taking these breath-taking photos of Hobbes and introducing me to a an amazing nature reserve right here in town.